Quick Overview
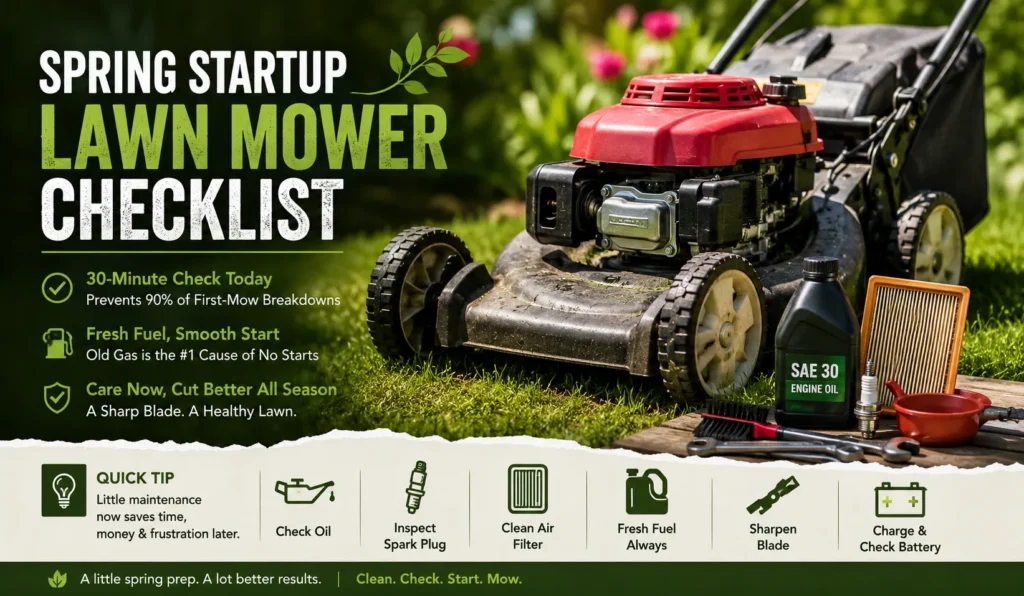
- A 30-minute spring startup check prevents 90% of first-mow breakdowns, according to Briggs & Stratton’s annual small engine service data (Briggs & Stratton, 2024).
- Old fuel is the single most common reason a gas mower won’t start after winter storage – drain it and add fresh gas before the first pull.
- Gas mowers need oil, spark plug, air filter, and blade checks every spring. Battery mowers need terminal inspection, a full charge cycle, and blade sharpening.
- Climate matters: Pacific Northwest owners deal with corrosion and moisture damage; Midwest owners deal with freeze-thaw stress on belts and tires; Southern owners often skip winterization entirely and pay for it in spring.
- If the engine cranks but won’t fire after fresh fuel and a new spark plug, the carburetor is likely gummed up – that’s a shop job for most homeowners.
Why Spring Startup Goes Wrong (And How to Avoid It)
Two things happen to mowers in winter: fuel goes bad and moisture gets in. Most spring startup problems trace back to one of these two causes.
What Sitting All Winter Does to a Mower
Gasoline starts breaking down after about 30 days. By March or April, what’s left in the tank and carburetor bowl is a varnish-like residue that clogs jets and prevents ignition. I’ve pulled apart carburetors on Craftsman and Toro gas mowers that looked like someone poured caramel inside them.
Beyond fuel, moisture is the other culprit. A mower stored in a damp Oregon garage will come out with corroded battery terminals, rust-spotted blades, and a deck covered in mold. Even in a dry Chicago garage, temperature swings cause condensation inside the fuel tank and engine block.
Metal parts on the deck rust. The air filter absorbs humidity and loses flow. Drive belts stiffen in the cold and crack at the first flex. None of this is catastrophic – but all of it adds up to a mower that won’t start, or one that runs rough and tears your lawn apart.
Gas vs. Battery Mowers – Different Problems, Same Season
Gas mowers are more vulnerable to long storage. The carburetor, fuel lines, spark plug, and oil all degrade over winter. You have more to check.
Battery mowers skip all the fuel issues. But they have their own spring checklist: battery terminals corrode, battery cells lose capacity when stored in freezing temperatures, and the blade dulls just like on any mower.
One thing both types share: the blade almost always needs sharpening. A dull blade tears grass instead of cutting it, which invites disease and turns a green lawn brown at the tips. This is the step most people skip, and it shows.
The Full Spring Lawn Mower Startup Checklist
Run through these steps in order before you try to start the engine. Don’t skip to step 7. The sequence matters.
Step 1 – Check and Change the Oil
Pull the dipstick and wipe it clean. Reinsert it fully, then pull it again to read the level. Look at the color. Fresh oil is amber. Old oil is dark brown to black. If you didn’t change the oil at the end of last season, change it now.
For most walk-behind mowers, you need SAE 30 for temperatures above 40°F or 10W-30 if you’re in a region where spring mornings dip close to freezing. Honda recommends 10W-30 for its GCV series engines specifically because of that cold-start factor (Honda Power Equipment, 2023).
To drain: disconnect the spark plug wire first. Tilt the mower toward the dipstick side and drain into a catch pan. Refill to the full mark – don’t overfill. Overfilling causes smoking and can damage the engine seals.
What people skip: Checking the oil after the first 5 minutes of running. Oil that looked fine cold can smell burned once the engine warms up. If it does, shut it down and drain it again.
Step 2 – Inspect and Replace the Spark Plug
The spark plug is cheap ($3-6) and it’s the first thing to replace if you don’t know when it was last changed. Pull it with a socket wrench (most mowers use a 5/8″ socket). Look at the tip.
A healthy plug has a light tan or gray electrode. A fouled plug is black with carbon, oily, or cracked. Replace it. Gap the new plug to the spec in your owner’s manual – most small engines call for 0.030 inches.
Reconnect the plug wire before moving on. Sounds obvious. It’s not – I’ve stood in my Nashville driveway pulling a cord for 10 minutes before realizing the wire was still sitting on the workbench.
Step 3 – Clean or Replace the Air Filter
Foam filters can be washed with warm soapy water, dried completely, and lightly coated with clean motor oil before reinstalling. Paper filters cannot be washed – tap them gently to knock out loose debris. If a paper filter is brown, compressed, or torn, replace it. They cost about $8.
A clogged air filter starves the engine of oxygen. The mower will run rough, bog down in thick grass, or refuse to start. This is a 5-minute fix that most people ignore until the engine is already struggling.
On EGO and other battery mowers, there’s no combustion air filter – but check the motor housing vents for packed grass and debris from last fall.
Step 4 – Drain Old Fuel and Add Fresh Gas
If you added fuel stabilizer at the end of last season, the fuel in the tank may still be usable. Smell it. Old gas has a sour, varnish-like odor. If it smells off, drain it.
Drain into an approved fuel container. Take it to your local hazardous waste collection point – don’t pour it on the ground or down a drain.
Fill with fresh 87-octane regular unleaded. Ethanol content matters here: avoid fuel with more than 10% ethanol (E10). E15 and E85 are not approved for small engines and will damage the carburetor over time (Outdoor Power Equipment Institute, 2024). Look for ethanol-free fuel at marinas or specialty stations if you want the cleanest possible option.
If you didn’t use stabilizer and the mower sat with fuel all winter, the carburetor bowl likely needs to be drained too. There’s a small drain screw on the bottom of most carburetors. Drain the bowl, add fresh fuel, and try starting. If it still won’t fire after a few pulls, the jets may be partially blocked – time for a carb cleaner spray or a shop visit.
Step 5 – Sharpen or Replace the Blade
Disconnect the spark plug wire before touching the blade. Always.
Tip the mower on its side (carburetor side up to avoid oil spill) and wedge a block of wood against the blade so it can’t spin. Use a socket to remove the center bolt. Pull the blade off.
Inspect the blade for:
- Nicks or deep gouges along the cutting edge
- Cracks, especially near the center hole or the tips
- Bends – run your finger along the flat to feel for warping
Bent blades are dangerous. I once found a bent blade on a Toro TimeMaster that looked straight to the eye but vibrated badly enough at speed to loosen the deck bolts. If a blade is bent at all, replace it – don’t try to straighten it.
Sharpening: a flat file or angle grinder at a 45-degree angle on the cutting edge removes nicks and restores the bevel. Maintain the original angle. Sharpen both cutting edges to the same length – an unbalanced blade causes vibration that damages the engine bearings over time. Check balance with a blade balancer ($4 at any hardware store) or by hanging it on a nail through the center hole. The heavy side dips. File it lighter until it hangs level.
Replacement blades run $15-25 at most hardware stores. If yours has more than a few deep nicks or any bends, just replace it.
Step 6 – Check the Deck, Wheels, and Drive Belt
Scrape last year’s packed grass off the underside of the deck with a stiff brush or scraper. Packed grass holds moisture and accelerates rust. Spray the clean deck with a light coat of silicone spray to reduce future buildup.
Check wheel height settings. Make sure all four wheels are set to the same height. Confirm the adjustment mechanisms aren’t seized or broken.
On self-propelled mowers, check the drive belt for cracking, fraying, or glazing. A glazed belt looks shiny on the contact surface and slips rather than gripping. On most Toro and Honda walk-behind self-propelleds, the belt is accessible after removing a cover plate on the rear of the deck. Replacement belts are model-specific – check your owner’s manual for the part number.
Riding mowers have more belts to check: the deck drive belt, the PTO belt, and sometimes a separate transmission belt. Inspect all of them. Replace anything that’s frayed, cracked, or stretched.
Step 7 – Test the Safety Features Before You Mow
Before you pull the cord or press start:
- Operator presence control (OPC): The bail handle or seat switch that stops the blade when you let go. Squeeze it and release it. The blade should stop within 3 seconds of release on walk-behinds.
- Blade brake clutch: On mowers with blade engage levers, confirm it engages and disengages smoothly.
- Seat switch (riding mowers): The mower should not start if no one is seated. Test this.
- Parking brake (riding mowers): Apply the brake. Try to move the mower. It should not roll.
Skipping safety checks is how people get hurt. The OPC system on most mowers is simple and rarely fails – but “rarely” isn’t “never.” Check it every spring.
Quick-Reference Checklist by Mower Type
| Task | Gas Walk-Behind | Battery Walk-Behind | Riding Mower |
|---|---|---|---|
| Oil change | Yes – every spring | N/A | Yes – every spring |
| Spark plug | Replace annually | N/A | Replace annually |
| Air filter | Clean or replace | Check motor vents | Clean or replace |
| Fuel drain/fresh fill | Yes | N/A | Yes |
| Blade sharpen | Yes | Yes | Yes – all blades |
| Belt inspection | Self-propelled only | N/A | All belts |
| Battery terminals | N/A | Clean and inspect | Check battery if electric start |
| Safety feature test | Yes | Yes | Yes |
How Climate Affects Your Spring Startup
Where you live changes which problems to look for first. A mower in Portland, Oregon has a very different winter than one in Kansas City or Atlanta.
Cold and Wet Climates (Pacific Northwest, Great Lakes, New England)
Moisture is the main enemy. In Portland or Seattle, a mower stored in an unheated garage absorbs months of damp air. Expect:
- Corroded spark plug threads (use anti-seize on the new plug before reinstalling)
- Rust on the blade and deck underside
- Moisture in the fuel tank (drain and refill with fresh gas regardless of age)
- Corrosion on battery terminals for battery mowers and electric-start riding mowers
Priority check: the blade and deck for rust, then fuel, then spark plug. If the deck rust is deep and pitted, sand it back to bare metal and apply rust-inhibiting deck paint before the season starts.
Freeze-Thaw States (Midwest, Upper South, Mountain West)
Chicago backyards, Denver garages, and Nashville front yards all deal with repeated freeze-thaw cycles through winter. The expansion and contraction stresses rubber parts and seals. Expect:
- Drive belt cracking and stiffness
- Tire pressure loss on riding mowers (cold contracts air; check and fill to the sidewall spec)
- Oil thickening – if the engine cranks slowly, old thickened oil is the likely cause; change it immediately
- Fuel varnish from temperature swings accelerating degradation
Priority check: the drive belt first, then oil viscosity, then fuel. For riding mowers, also inspect tires before the first use.
Mild Winters (Southeast, Texas, Southern California)
In Atlanta or Austin, grass may never fully go dormant. Some homeowners mow year-round, which changes the spring calculus. The mower may have been used as recently as January. But shorter storage periods don’t mean skip the checklist.
Bermuda and Zoysia turf in the Southeast come out of dormancy fast and need sharp blades to transition cleanly. A dull blade on Bermuda in April leaves the lawn looking gray and stressed.
The bigger risk in mild climates is complacency. A mower that ran fine in December doesn’t mean the blade hasn’t dulled, the oil hasn’t darkened, or the air filter hasn’t clogged with a winter’s worth of debris.
Priority check: blade sharpness first, then air filter, then oil.
Climate-Based Startup Priority Guide
| Climate Zone | First Priority | Second Priority | Third Priority |
|---|---|---|---|
| Pacific Northwest / New England | Rust and corrosion | Fresh fuel | Spark plug |
| Great Lakes / Midwest | Drive belt condition | Oil change | Fresh fuel |
| Freeze-thaw (Upper South, Mountain) | Belt and tires | Oil viscosity | Fuel drain |
| Mild winters (Southeast, Texas, SoCal) | Blade sharpness | Air filter | Oil check |
Common Parts That Need Replacing Every Spring
Not everything wears at the same rate. Some parts last several seasons. Others should come off every year without question.
When to Replace vs. When to Just Clean
The air filter question trips people up. A foam filter that’s gray but intact can be washed and reused. A paper filter that’s been in there for two seasons in a dusty climate needs to go. When in doubt: a new paper filter costs $8 and eliminates a variable.
Spark plugs are cheap enough that annual replacement is the right call for most people. If you’re methodical about maintenance and you pull the plug to inspect it every spring, you can stretch to every other year. But the time you try to nurse a borderline plug through another season is the season it fails mid-lawn.
The blade is the gray area. A blade with minor edge wear that sharpens cleanly and balances well can last two or three seasons if you’re not hitting rocks or roots. A blade with cracks, deep gouges, or any bend is done – replace it.
Drive belts should be inspected every spring and replaced at the first sign of cracking, glazing, or fraying. A belt that fails mid-mow on a riding mower means a tow back to the garage and a parts run.
Where to Buy Parts Without Overpaying
Dealer pricing on OEM parts can be two or three times what you’ll pay elsewhere. For common parts like spark plugs, air filters, and oil, big-box hardware stores (Home Depot, Lowe’s, Ace Hardware) carry cross-compatible alternatives at reasonable prices. Champion and NGK make spark plugs that fit most Briggs & Stratton, Kohler, and Honda engines.
For belts and blades, check the mower’s model number (stamped on the deck or engine) and search online retailers like Jack’s Small Engines or Stens for aftermarket equivalents. Quality varies – read reviews and avoid the cheapest options for belts, where a failure causes damage.
OEM parts from a local dealer are worth it for carburetor components, where aftermarket quality is inconsistent, and for anything covered under warranty.
Part Lifespan and Replacement Cost Estimates
| Part | Average Lifespan | Replacement Cost (US, 2024) |
|---|---|---|
| Spark plug | 1-2 seasons | $3 – $6 |
| Paper air filter | 1 season | $7 – $12 |
| Foam air filter | 2-3 seasons (with cleaning) | $5 – $10 |
| Mower blade (walk-behind) | 2-4 seasons | $15 – $30 |
| Mower blade (riding) | 2-4 seasons per blade | $20 – $45 each |
| Drive belt (walk-behind) | 3-5 seasons | $12 – $25 |
| Drive belt (riding, deck) | 2-4 seasons | $20 – $60 |
| Battery (battery mower) | 3-5 years | $80 – $200 |
Mistakes People Make on the First Mow of the Year
Starting well doesn’t mean mowing well. The first mow of spring is where a lot of homeowners undo their own prep work.
Cutting Too Low Too Early
The instinct after a long winter is to scalp the lawn back to a neat, short cut. That’s the wrong move. Cool-season grasses like fescue and bluegrass come out of dormancy stressed. Warm-season grasses like Bermuda and Zoysia are just starting to green up. Cutting too low removes the leaf tissue the grass needs to photosynthesize and recover.
The rule on cutting height: never remove more than one-third of the blade in a single pass. For fescue lawns in the Carolinas or the Pacific Northwest, that means keeping the first spring cut at 3.5 to 4 inches. For Bermuda in Georgia or Texas, the first mow might be at 2 inches, but only once the grass is actively growing and at least 50% green.
Set the deck height before you start. Check all four wheels are at the same notch. Walk the first strip and look at what comes off. If you’re pulling up brown thatch and scalping bare soil, raise the deck.
Skipping the Test Run Before a Full Yard
Start the mower and let it run for 3-5 minutes before you mow a single strip. Listen to the engine. A healthy small engine settles into a smooth idle within 30 seconds of starting. Rough idling, surging (RPM going up and down), or white or blue smoke from the exhaust are all reasons to stop and diagnose before you mow.
White smoke in the first 30 seconds is usually normal – it’s condensation burning off. White smoke that continues after warmup means water in the fuel. Blue smoke means oil is burning, which points to an overfill or a worn engine seal.
Walk the perimeter of the yard before you mow. Look for branches, rocks, and anything the blade could hit. One rock strike can nick a freshly sharpened blade. A buried sprinkler head can crack a blade entirely.
My Final Recommendation
Every spring, I hear the same story from neighbors: they pulled the mower out of the garage, yanked the cord five times, got frustrated, and called a repair shop. The shop charged $120 to do exactly what this checklist covers – change the oil, replace the spark plug, drain the old fuel, and clean the carburetor. Thirty minutes of work.
The checklist feels like overkill when your mower ran fine last October. But October was 6 months ago. Gas went stale. Oil darkened. Moisture got in. The blade dulled against the fall leaves you mulched. These things happen on a schedule, not because of anything you did wrong.
My one honest caveat: if you drain the old fuel, install a new spark plug, add fresh gas, and the engine still cranks but won’t fire – the carburetor is probably gummed up beyond what a spray can of carb cleaner will fix. At that point, you’re either pulling the carb yourself (a legitimate DIY job with a YouTube video and a $15 rebuild kit) or taking it to a shop. There’s no shame in that call. A shop visit once every few years beats a breakdown mid-lawn every time.
Do the 30-minute check. Your mower will start on the first pull, the lawn will look clean, and you won’t be buying a new machine you didn’t need.
DIY Spring Startup vs. Professional Tune-Up Service
| Factor | DIY Checklist | Professional Tune-Up |
|---|---|---|
| Cost | $20 – $50 (parts) | $80 – $150 (labor + parts) |
| Time required | 30 – 45 minutes | Drop-off + wait (1-3 days) |
| Parts quality | Your choice | Shop-selected (usually OEM) |
| Carburetor cleaning | Spray only; pull-and-clean is advanced | Full disassembly and cleaning |
| Blade sharpening | DIY with file or grinder | Machine-sharpened and balanced |
| Best for | Routine annual maintenance | Carb issues, engine problems, first-time owners |
| Risk | Mistakes possible without experience | Minimal risk |
| Warranty impact | None on most machines | May preserve dealer warranty |
Frequently Asked Questions About Spring Lawn Mower Startup
What is a spring lawn mower startup checklist?
A spring lawn mower startup checklist is a sequence of mechanical checks and maintenance tasks you perform on a gas or battery mower before its first use after winter storage. It covers oil, spark plug, air filter, fuel, blade, belts, and safety systems. Running through these steps prevents the majority of first-mow breakdowns.
How long does the spring startup checklist take?
For a walk-behind gas mower, plan on 30 to 45 minutes if you have the parts on hand. A riding mower takes 45 to 90 minutes depending on the number of belts and blades. Battery walk-behind mowers take about 20 minutes since there are no fuel or oil checks.
What type of oil goes in a lawn mower in spring?
Most walk-behind mowers use SAE 30 for temperatures above 40°F. If your spring mornings regularly dip below 40°F, use 10W-30, which flows better at cold temperatures. Check your engine’s owner manual – the grade is printed on the engine housing on most Briggs & Stratton and Honda engines. Never use automotive oil with high detergent additives in small air-cooled engines.
Why won’t my lawn mower start after winter?
The most common cause is stale fuel. Gas degrades over 30-90 days, leaving varnish deposits in the carburetor jets that block fuel flow. Drain the old fuel, add fresh regular unleaded (E10 max), and try again. If it still won’t start after fresh fuel and a new spark plug, the carburetor likely needs cleaning or rebuilding.
Do battery lawn mowers need spring maintenance?
Yes. Battery mowers don’t need oil or fuel checks, but they do need blade sharpening, terminal cleaning, battery inspection, and a full charge cycle before the first mow. If the battery was stored in freezing temperatures, it may have lost some capacity permanently. Run a full charge and check the runtime on the first mow – a battery that once lasted 45 minutes but now dies at 20 minutes has degraded and may need replacing.
When should I take my mower to a professional instead of doing it myself?
Take it to a shop if the engine cranks but won’t fire after fresh fuel and a new spark plug (likely a carburetor issue), if there’s persistent blue or white smoke after warmup, if the deck vibrates excessively (possible bent crankshaft), or if you’re not comfortable with any step on this list. A professional tune-up runs $80 to $150 and includes a full carburetor clean – worth it if the mower has been sitting for more than one year without running.
Is it safe to mow with a dull blade?
A dull blade won’t injure you, but it damages the lawn. Dull blades tear grass rather than cutting it. Torn grass tips turn brown, making the lawn look stressed even when it’s healthy. The torn tips also create entry points for fungal disease. Sharpen or replace the blade every spring, or any time you notice ragged brown tips after mowing.