
Quick Overview
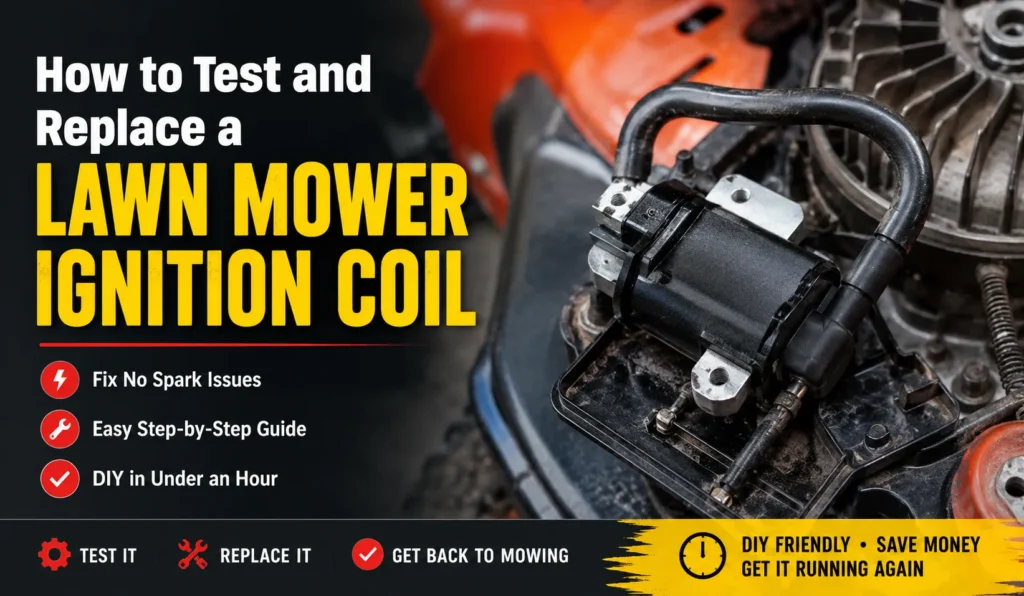
- A lawn mower ignition coil sends a high-voltage spark to the plug so your engine can start and keep running.
- Top warning signs: no spark, hard starting, random stalling, or a mower that dies once it warms up.
- You can test a coil in ten minutes with a fifteen-dollar spark tester and a cheap multimeter.
- Replacing one is a beginner-friendly DIY job. Most swaps take under an hour and cost less than a shop visit.
Why Your Mower Won’t Start (And Why I Always Check the Coil)
Last spring, my neighbor’s Toro sat dead in his garage for two weeks. New spark plug. New gas. Fresh air filter. Still nothing.
He finally rolled it over to my driveway on a Saturday morning, coffee in hand, half-convinced the whole engine was junk. I pulled the plug, held it against the block, and yanked the cord. No spark. Not even a flicker.
That’s when we talked about the lawn mower ignition coil. It’s the part most people skip right past, because it’s hidden under the flywheel and nobody thinks about it until the mower won’t fire.
This guide is for anyone who owns a push mower or riding mower and wants to fix a no-spark problem themselves. You don’t need a small engine certification. You need a multimeter, some patience, and about an hour.
What Does a Lawn Mower Ignition Coil Actually Do?
The ignition coil turns a small pulse of magnetism into a jolt of high voltage. That jolt jumps across your spark plug gap and ignites the fuel in the cylinder. No coil, no spark. No spark, no start.
How It Fits Into the Starting System
Here’s the short version of how the whole system works together.
Your flywheel spins past the coil as you pull the starter cord. Magnets built into the flywheel pass close to the coil’s metal core. That movement creates a small electrical charge inside the coil.
The coil steps that charge way up, sometimes to over 20,000 volts, and fires it down the spark plug wire. This whole process is sometimes called the magneto system, since the flywheel magnets and the coil work as a pair.
If the timing is off, or the coil is weak, you get a weak spark or no spark at all. The engine either won’t start, or it starts and dies.
Signs the Coil Might Be the Problem
I’ve chased down a lot of no-start mowers over the years. These are the patterns that usually point to the coil.
- No spark at all when you pull the cord, even with a fresh plug installed
- The mower starts cold but stalls once the engine warms up
- Spark is present but looks weak, thin, or orange instead of a strong blue-white snap
- The engine backfires or runs rough at higher RPM
- You’ve already replaced the plug and checked the fuel, and it still won’t start
None of these guarantee it’s the coil. But they’re your cue to test it before you spend money guessing.
Tools You’ll Need Before You Start
You don’t need a shop full of equipment for this job. Most of what you need probably lives in your garage already.
Basic Hand Tools
Grab a socket set, a flathead and Phillips screwdriver, and a small wire brush. You’ll use these to remove the flywheel cover, the old coil, and to clean up any corrosion on the mounting points.
A torque wrench helps too, though it’s not required. Overtightening coil mounting screws can crack the housing, so go snug, not gorilla-tight.
Multimeter and Spark Tester
These two tools are the real stars of this job. A basic multimeter, the kind you can buy for fifteen to twenty-five dollars, measures resistance in ohms. That tells you if the coil’s windings are intact.
A spark tester clips onto the plug wire and shows you a visible spark as you pull the cord. I like this test because it’s fast, and you don’t have to guess at a number on a screen.
Compression Table: Tools by Task and Cost
| Tool | Task | Typical Cost |
|---|---|---|
| Inline spark tester | Confirms spark is present and strong | $10-$15 |
| Digital multimeter | Measures coil resistance in ohms | $15-$30 |
| Feeler gauge | Sets the air gap between coil and flywheel | $5-$10 |
| Socket and wrench set | Removes flywheel cover and coil mounts | $20-$50 |
| Wire brush | Cleans corrosion off mounting points | $3-$8 |
How to Test a Lawn Mower Ignition Coil
Start with the spark test. It’s the fastest way to know if you even have a spark problem, before you touch a wrench.
The Spark Test (Quick and Easy)
Pull the spark plug and connect it to the plug wire. Lay the plug’s metal body against bare metal on the engine block, away from the spark plug hole itself. Never test with the plug still threaded into the cylinder. Fuel vapor can ignite.
Pull the starter cord sharply and watch the gap. A healthy coil throws a strong blue-white spark you can see even in daylight. A weak orange spark, or nothing at all, points to coil trouble, a bad plug wire, or a grounding issue with the kill switch.
If you have an inline spark tester, use it instead of the loose plug. It’s safer and gives you a clearer view of the spark strength.
The Multimeter Resistance Test
This test checks the coil’s internal windings without needing the engine to run. Set your multimeter to the ohms setting.
Most mower coils have a primary winding and a secondary winding. The primary reading usually falls between 0.4 and 2 ohms. The secondary, measured from the spark plug wire to the coil’s ground, typically reads somewhere between 6,000 and 20,000 ohms depending on the brand.
Check your engine’s service manual for exact numbers. Briggs & Stratton, Kohler, and Honda each publish slightly different specs for their coil models.
If your reading is way outside the expected range, or shows zero resistance (a short) or infinite resistance (an open circuit), the coil has failed.
Common False Positives (Don’t Replace It Yet)
Before you order a new coil, rule these out. I’ve seen people replace a perfectly good coil because the real problem was somewhere else.
- A cracked or fouled spark plug can mimic coil failure. Swap in a known-good plug first.
- A faulty kill switch or safety interlock can ground out the spark entirely, even with a healthy coil.
- Corroded or loose wire connections between the coil and the kill switch wire cause intermittent no-spark issues.
- Old, cracked spark plug wires leak voltage before it ever reaches the plug.
Rule these out first. It takes five extra minutes and can save you fifteen dollars and a wasted trip to the parts store.
Compression Table: Test Results and What They Mean
| Test Result | Likely Cause | Next Step |
|---|---|---|
| No spark, multimeter reads normal | Kill switch or wiring issue | Check kill switch continuity |
| No spark, multimeter reads zero or infinite | Coil has failed internally | Replace the coil |
| Weak orange spark | Wide air gap or worn coil | Reset air gap, retest |
| Spark present, engine still won’t start | Fuel or carburetor issue | Check fuel delivery, not the coil |
| Spark fine cold, disappears when hot | Coil breaking down under heat | Replace the coil |
How to Replace a Lawn Mower Ignition Coil
Once you’ve confirmed the coil is bad, the replacement itself is straightforward. I’ve done this on Briggs & Stratton, Kohler, and Honda engines, and the steps are nearly identical across brands.
Before you start, disconnect the spark plug wire and, on riding mowers, disconnect the battery. This isn’t optional. An engine can still fire from a stray spark even with the key off.
Step 1 — Removing the Old Coil
Remove the flywheel shroud or cover to expose the coil. It’s usually held on by two or three screws and sits right above the flywheel’s magnets.
Disconnect the kill switch wire and the spark plug wire from the coil. Take a photo with your phone first. It sounds simple, but I’ve mixed up wire routing before, and a photo saves you guesswork later.
Loosen the mounting screws and lift the coil free. Some coils have laminated metal legs that can be bent or damaged if you force them, so work slowly.
Step 2 — Setting the Air Gap
The air gap is the small space between the coil’s legs and the flywheel magnets as they spin past. Get this wrong and your new coil will throw a weak spark or none at all.
Most residential mowers call for a gap between 0.010 and 0.014 inches, though you should always confirm your engine’s exact spec. Slide a feeler gauge of the correct thickness between the coil and the flywheel, then snug the coil screws down while the gauge holds the spacing.
Pull the feeler gauge out before you tighten the screws all the way. I’ve forgotten this step exactly once, and the gauge got wedged in there tight enough that I had to loosen everything and start over.
Step 3 — Installing the New Coil
Position the new coil against the mounting bosses and thread the screws in by hand first. This keeps you from cross-threading anything into the engine block.
Reconnect the kill switch wire and spark plug wire the same way you photographed them in Step 1. Tighten the mounting screws evenly, snug but not overtightened.
Reinstall the flywheel shroud once everything is connected and the air gap is set.
Step 4 — Testing Before You Reassemble Everything
Don’t button up the whole mower yet. Reconnect the spark plug, hook up your spark tester, and pull the cord.
You’re looking for that strong blue-white spark again. If you see it, reinstall the spark plug in the cylinder, reconnect everything, and try starting the mower for real.
If there’s still no spark, double check your wire connections and the air gap before assuming the new coil is defective. New parts do occasionally fail, but wiring mistakes are far more common.
Compression Table: Coil Brands and Compatibility
| Brand | OEM Part Behavior | Aftermarket Notes |
|---|---|---|
| Briggs & Stratton | Precise fit, consistent air gap spec | Aftermarket coils work well if gap is set correctly |
| Kohler | OEM coils ship pre-gapped on some models | Aftermarket versions may need manual gap setting |
| Honda | Tight tolerances, less aftermarket variety | Fewer budget options, OEM often the easier choice |
| Toro (Briggs/Kohler engines) | Follows base engine spec | Match coil to the engine brand, not the mower brand |
Mistakes I See People Make Every Time
I’ve watched a lot of first-time DIYers hit the same three snags. Save yourself the frustration.
Skipping the Air Gap Check
A new coil installed with the wrong air gap will still run, sometimes. It just runs poorly, with weak spark and hard starting. Always check the gap, even on a brand-new part straight out of the box.
Buying the Wrong Coil for Their Engine
Mower brands like Toro and Craftsman don’t make their own engines. They use Briggs & Stratton, Kohler, or Honda engines under the hood. Match your coil to the engine model number, not the mower brand printed on the deck.
Assuming It’s the Coil When It’s Really the Kill Switch
This is the single most common misdiagnosis I see. A grounded-out kill switch wire kills spark just like a bad coil does. Test switch continuity with your multimeter before you buy a replacement coil.
Pros and Cons Table (DIY Replacement vs. Shop Repair)
| Factor | DIY Replacement | Shop Repair |
|---|---|---|
| Cost | $15-$40 for the part | $80-$150 including labor |
| Time | 30-60 minutes | Same day to a few days, depending on shop backlog |
| Skill required | Basic tools, patience with small parts | None, but you’re paying for it |
| Risk | Wrong air gap or wire mix-up if rushed | Low, shop double-checks the work |
| Best for | Push mowers, confident first-timers | Riding mowers with electrical complexity, or no time to DIY |
My Final Recommendation
If you’ve got a multimeter, a spark tester, and an hour on a Saturday, replacing your own lawn mower ignition coil is one of the more satisfying small engine repairs you can tackle. It’s not fussy work. It just asks for patience with the air gap and care with the wiring.
I’d only send this job to a shop if you’re working on a riding mower with a more tangled wiring harness, or if you’ve already swapped the coil and you’re still chasing a no-spark condition. At that point you’re likely dealing with a wiring or safety switch issue that benefits from a second set of hands and a scope.
For a basic push mower with a straightforward no-spark problem, though, this is a job worth doing yourself. There’s nothing quite like hearing that engine catch on the first pull after you fixed it in your own garage.
Frequently Asked Questions About Lawn Mower Ignition Coils
What is a lawn mower ignition coil?
It’s the part that turns a small magnetic pulse from the spinning flywheel into a high-voltage spark. That spark jumps the spark plug gap and ignites the fuel-air mixture in the cylinder.
How do I know if my mower’s ignition coil is bad?
Test for spark using an inline spark tester while pulling the starter cord. No spark, or a weak orange spark instead of a strong blue-white one, usually points to a failing coil.
Can I test a mower ignition coil with a multimeter?
Yes. Set the multimeter to ohms and check the primary and secondary winding resistance against your engine’s service manual specs. A zero or infinite reading means the coil has failed.
What is the correct air gap for a lawn mower coil?
Most residential engines call for a gap between 0.010 and 0.014 inches, though the exact spec varies by engine brand and model. Always check your engine’s manual before setting the gap.
Is replacing a lawn mower ignition coil a DIY-friendly repair?
For most push mowers, yes. It typically takes under an hour with basic hand tools, a feeler gauge, and a replacement coil costing between fifteen and forty dollars.
Can a bad kill switch be mistaken for a bad ignition coil?
Yes, and it happens often. A grounded-out kill switch wire cuts spark the same way a failed coil does. Always test switch continuity before replacing the coil.
Do OEM coils work better than aftermarket ones?
OEM coils fit precisely and sometimes arrive pre-gapped. Aftermarket coils are usually more affordable and work fine, as long as you set the air gap correctly during installation.