
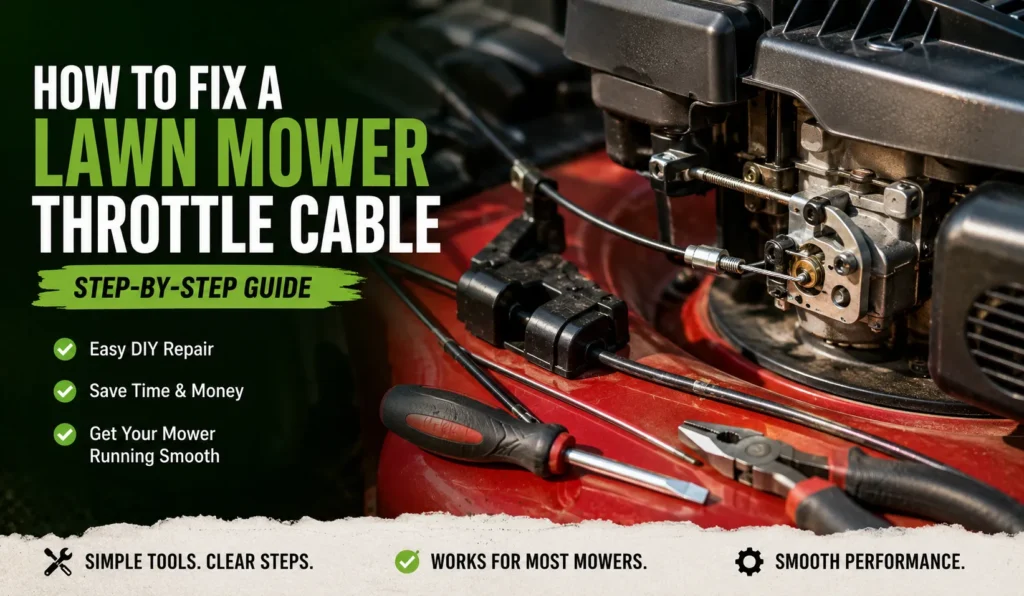
Quick Overview
- Learning how to fix a lawn mower throttle cable takes most people 30-60 minutes with basic hand tools.
- A frayed, corroded, or stretched cable is the most common cause of a stuck or unresponsive throttle.
- You do not need to remove the engine. You only need to access the throttle lever, the cable housing, and the carburetor linkage.
- Buy a replacement cable that matches your mower’s brand and model. Universal cables work, but only if you measure length correctly.
- Most DIYers can save $60-$120 by skipping a repair shop visit for this specific job.
My throttle cable snapped on a hot July morning in my Florida garage. I pulled the cord, the engine roared to life, and then nothing. The throttle lever just flopped in my hand.
That mower sat half-mowed in my yard for two days while I figured out what went wrong.
If you’re here because your mower won’t rev up, won’t idle down, or the throttle lever feels loose and disconnected, you’re probably dealing with a broken or stretched cable. Learning how to fix a lawn mower throttle cable is one of the easier small-engine repairs you can do yourself.
This guide is for homeowners with a basic toolbox and zero small-engine experience. I’ve fixed this exact problem on Toro, Honda, Craftsman, and Troy-Bilt mowers, in three very different climates. I’ll walk you through what I’ve learned, including the mistakes I made the first few times.
Why Throttle Cables Fail (and Why It’s Not as Scary as It Sounds)
A throttle cable fails because the metal wire inside stretches, frays, or corrodes over time. It’s a mechanical part under constant tension, so wear is normal, not a sign you did something wrong.
The cable connects your throttle lever (the one you push to speed up or slow down the engine) to the carburetor linkage. When that connection breaks, the engine can’t get more or less fuel and air on command.
The good news: this is a $10-$25 part on most mowers. It’s one of the cheapest and most beginner-friendly repairs in the small-engine world.
Common Signs Your Throttle Cable Is Broken
- The engine only runs at one speed, no matter where you move the throttle lever.
- The throttle lever feels loose, floppy, or doesn’t spring back on its own.
- You can see a frayed wire poking out of the cable housing near the lever or the carburetor.
- The mower won’t idle down, and it revs high even at low throttle settings.
- The lever moves, but nothing happens at the engine end.
Is It the Cable or Something Else?
Before you order a new cable, rule out the cheaper problem: a dirty carburetor linkage. Grass clippings and dried grease can jam the linkage arm so it looks like a cable problem.
Push the throttle lever slowly and watch the small metal arm on the carburetor. If it moves smoothly with the lever, your cable works fine. If the arm sticks or doesn’t move at all, clean it first with carburetor cleaner before you touch the cable.
I made this mistake on a Craftsman mower in my first year of DIY repairs. I bought a new cable, installed it, and had the exact same problem. The real issue was a gummed-up linkage from old fuel residue.
Tools and Parts You’ll Need Before You Start
You need basic hand tools and one replacement part. Nothing here requires a trip to a specialty store, and most homeowners already own half of this list.
Basic Tools Checklist
- Needle-nose pliers
- A small flathead or Phillips screwdriver, depending on your mower
- An adjustable wrench or a 10mm socket wrench
- Wire cutters (only needed if your old cable is seized and must be cut out)
- Zip ties for securing the new cable housing
- Work gloves and safety glasses
How to Find the Right Replacement Cable
Match the cable to your exact mower model, not just the brand. Cable length and end-fitting shape vary even within the same manufacturer’s lineup.
Check the small metal plate on your mower deck or under the seat for the model number. Search that model number plus “throttle cable” on your mower brand’s parts site, or call a local small-engine shop and read them the number.
If you can’t find an exact match, a universal throttle cable works. Just measure your old cable end to end, including both mounting brackets, before you order.
Compression Table: Common Cable Types by Brand
| Brand | Typical Cable Type | Average Cost | Where Cable Routes |
|---|---|---|---|
| Toro | Push-pull cable, plastic end clip | $12-$20 | Handle to carburetor, along handle bar |
| Honda | Sheathed cable, metal barrel end | $15-$28 | Handle to governor arm |
| Craftsman | Push-pull cable, spring-loaded | $10-$18 | Handle to carburetor linkage |
| Troy-Bilt | Sheathed cable, clip-on end | $12-$22 | Handle to throttle control plate |
Prices reflect typical retail ranges for genuine and aftermarket parts (Repair Clinic, 2025).
How to Fix a Lawn Mower Throttle Cable Step-by-Step
This job takes 30-60 minutes for most people doing it the first time. Once you’ve done it once, expect 20 minutes on the next mower.
Step 1 — Disconnect the Spark Plug
Pull the spark plug wire off before you touch anything else. This is the single most important safety step in this entire repair.
A mower engine can fire unexpectedly if the blade or flywheel gets bumped during the repair, even with the mower off. Disconnecting the spark plug wire removes that risk completely.
Set the wire aside where it won’t accidentally touch the plug again while you work. I clip mine to the mower handle with a binder clip so I don’t forget.
Step 2 — Locate and Remove the Old Cable
Trace the cable from the throttle lever on the handle down to the carburetor linkage or governor arm. You’ll see it held in place by a small clip, a screw, or a spring hook at each end.
Use your needle-nose pliers to unhook the cable end from the throttle lever first. Then move to the carburetor end and do the same thing there.
Note how the cable housing is routed along the handle and down to the engine before you remove it fully. Take a phone photo here. This single habit saves more frustration than any tool on your list.
If the old cable is corroded or seized inside its housing, it may not pull free easily. In that case, cut the outer housing with wire cutters near both ends, and pull the cut sections off separately.
Step 3 — Install the New Cable
Route the new cable along the exact same path as the old one, using your photo as a reference. Getting the routing wrong can cause the cable to rub against the engine or bind against moving parts.
Hook the carburetor end of the cable onto the linkage arm first, since that end is usually harder to access once the housing is secured.
Then attach the throttle-lever end at the handle, making sure the cable sits inside any guide clips along the handle bar.
Secure loose sections of the cable housing to the mower frame with zip ties, matching how the original cable was fastened. This keeps the cable from vibrating loose or catching on the blade housing during mowing.
Step 4 — Adjust Cable Tension
Move the throttle lever to the “fast” position and check that the carburetor linkage arm moves fully to its own fast position at the same time. If the linkage arm doesn’t reach full travel, your cable has too much slack.
Most cables have an adjustment barrel or a set screw near the carburetor end. Loosen it, pull any slack out of the cable, then retighten it while holding the throttle lever at “fast.”
Cable tension matters more than most people expect. Too loose, and the engine won’t reach full RPM. Too tight, and the engine may not idle down or shut off properly.
Step 5 — Test the Throttle Response
Reconnect the spark plug wire, then start the mower and watch how the engine responds as you move the throttle lever through its full range.
The engine should rev up smoothly when you push the lever to “fast” and settle into a steady idle when you pull it back to “slow.” There shouldn’t be any hesitation, sticking, or delay.
If the response feels off, shut the engine down, disconnect the spark plug again, and revisit your tension adjustment from Step 4. This is normal. I rarely get the tension perfect on the first try.
Compression Table: Time and Difficulty by Step
| Step | Average Time | Difficulty (1-5) | Most Common Mistake |
|---|---|---|---|
| 1. Disconnect spark plug | 1 minute | 1 | Forgetting this step entirely |
| 2. Remove old cable | 10-15 minutes | 2 | Not photographing the routing path |
| 3. Install new cable | 10-15 minutes | 3 | Misrouting the cable near the blade housing |
| 4. Adjust tension | 5-10 minutes | 3 | Over-tightening the adjustment barrel |
| 5. Test throttle response | 5 minutes | 1 | Skipping the retest after adjustment |
What I Learned Fixing Cables in Different Conditions
The same repair plays out differently depending on where you live. Climate affects how the cable wears and how it behaves during the fix itself.
Humid Climates (Florida, Southeast) and Cable Corrosion
In my Florida garage, corrosion is the number one cause of throttle cable failure. Moisture gets inside the cable housing and rusts the inner wire, and the cable eventually seizes or snaps.
You’ll know corrosion is the problem if the old cable feels gritty or won’t slide smoothly through its housing before you even remove it. On one Honda mower, the wire had rusted solid inside the housing after just two summers.
If you’re in a humid region, apply a light coat of silicone spray to the new cable housing before installing it. This slows down future corrosion significantly.
Dry, Dusty Terrain (Arizona, Southwest) and Cable Fraying
A Phoenix driveway repair taught me a different lesson. Dust works its way into the cable housing and acts like sandpaper on the inner wire every time you move the throttle.
Cables in dry, dusty regions tend to fray rather than rust. You’ll often see individual wire strands sticking out near the housing ends before full failure happens.
Wipe down the exposed cable regularly if you mow in dusty conditions, and consider replacing the cable every 3-4 years even if it hasn’t failed yet.
Cold Mornings (Midwest) and Stiff Cables
A Minnesota spring morning brings its own quirk: cold cables get stiff, and a stiff cable can feel broken when it’s actually just cold. I’ve had customers call about a “dead throttle” that worked fine an hour later once the engine and cable warmed up.
Cold weather doesn’t cause permanent damage on its own, but it does make existing wear more obvious. A cable that’s already 80% worn may finally give out on that first cold start of the season.
If your mower throttle feels stiff only on cold mornings, that’s a warning sign, not necessarily a repair job yet.
Compression Table: Climate Effects on Throttle Cables
| Climate | Primary Failure Mode | Warning Sign | Preventive Fix |
|---|---|---|---|
| Humid (FL, Southeast) | Internal corrosion | Gritty, stiff movement | Silicone spray on housing |
| Dry/Dusty (AZ, Southwest) | Wire fraying | Visible frayed strands | Regular wipe-downs, earlier replacement |
| Cold (Midwest) | Temporary stiffness exposing existing wear | Stiff only on cold starts | Warm up engine before full-throttle use |
Common Mistakes People Make During This Repair
Most people don’t fail at the mechanical steps. They fail at the small details around the repair itself.
Using the Wrong Cable Length
A cable that’s even half an inch off in length can bind or fail to reach full travel. I’ve seen homeowners force a slightly-too-short universal cable into place, only to strip the adjustment barrel trying to compensate.
Always measure your old cable, mounting bracket to mounting bracket, before ordering a replacement. Don’t rely on brand name alone.
Over-Tightening or Under-Tightening
This is the mistake I made most often early on. Over-tightening the cable pulls the carburetor linkage past its resting position, so the engine won’t idle down or shut off cleanly.
Under-tightening leaves slack in the system, so the throttle lever moves but the carburetor barely responds. Set tension so the linkage reaches full “fast” travel with the lever fully pushed, and reaches its resting “idle” position with the lever fully released. Nothing more, nothing less.
DIY vs. Calling a Repair Shop
| Factor | DIY Repair | Repair Shop |
|---|---|---|
| Average cost | $10-$28 (parts only) | $60-$120 (parts + labor) |
| Average time | 30-60 minutes | 1-3 days (drop-off + wait) |
| Skill level needed | Beginner-friendly | None required |
| Best for | Standard cable replacement on accessible mowers | Seized linkages, engine access issues, warranty repairs |
| Risk if done wrong | Mower won’t idle properly, needs re-adjustment | Covered by shop guarantee |
If your mower is still under warranty, a shop repair protects that coverage. For most out-of-warranty mowers, this is a solid first DIY repair to attempt.
My Final Advice
I’ve fixed this exact problem more times than I can count, on mowers from three different corners of the country, and the repair itself hasn’t gotten any harder. What’s changed is how I approach it: measure twice, photograph the routing before you disconnect anything, and don’t rush the tension adjustment at the end.
The part is cheap, the tools are basic, and the actual mechanical work rarely takes more than an hour. The people who struggle with this repair usually skip the small prep steps, not the big ones.
If your mower’s throttle feels dead or stuck, don’t assume the worst. Check the cable first. There’s a good chance you’ll have your mower running smoothly again before your coffee gets cold.
Frequently Asked Questions About Fixing a Lawn Mower Throttle Cable
What is a throttle cable on a lawn mower?
A throttle cable is the wire that connects your mower’s throttle lever to the carburetor linkage. It lets you control engine speed by moving the lever, which pulls or releases tension on the cable.
How do I know if my throttle cable is broken?
Common signs include a lever that feels loose or floppy, an engine stuck at one speed, or visible frayed wire near the cable housing. If the carburetor linkage doesn’t move when you move the lever, the cable has likely failed.
Can I fix a throttle cable myself without mechanic experience?
Yes. This repair only requires basic hand tools and about 30-60 minutes. Most homeowners can complete it successfully by following the cable’s original routing and setting proper tension afterward.
How much does a replacement throttle cable cost?
Most replacement cables cost between $10 and $28, depending on your mower’s brand and model. A repair shop typically charges $60-$120 total once labor is included.
What’s the difference between a throttle cable and a choke cable?
A throttle cable controls engine speed, while a choke cable controls the air-fuel mixture for cold starts. They’re separate cables on most mowers, though they sometimes run through the same housing section near the handle.
Do I need to remove the mower deck to replace the throttle cable?
No. On nearly all walk-behind mowers, the cable runs along the handle and down to the carburetor without requiring deck removal. You only need access to the handle, the cable’s routing path, and the carburetor linkage.