
Quick Overview
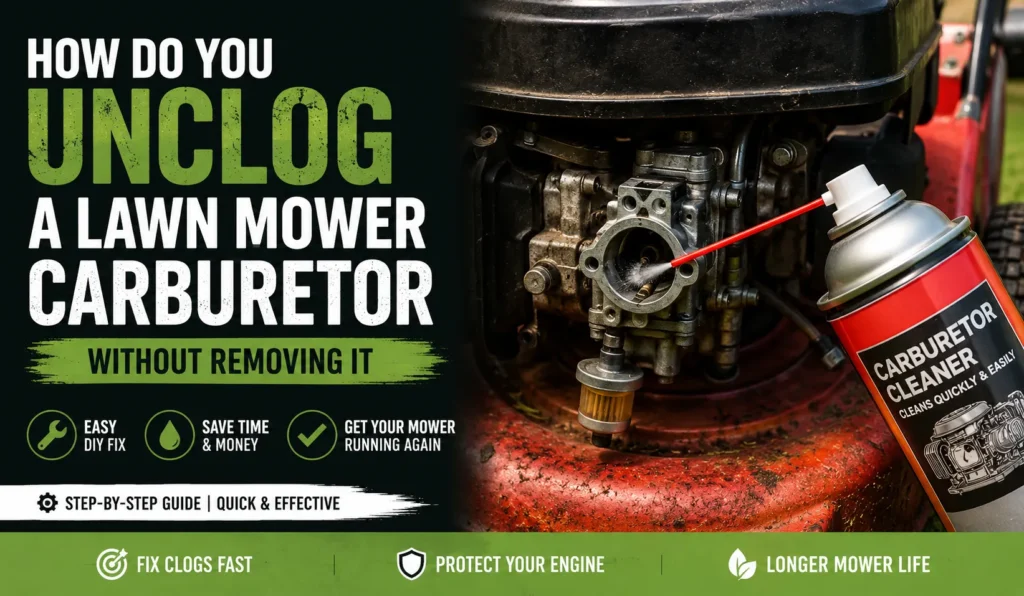
- You can unclog a lawn mower carburetor without removing it by draining old fuel, spraying carb cleaner into the throat and idle jet, and clearing the fuel line and filter.
- This in-place method fixes most gunk and varnish clogs caused by ethanol fuel that sat all winter.
- It will not fix a carburetor with a torn diaphragm, a stuck float, or heavy rust inside the bowl.
- Plan on 30 to 60 minutes and under $20 in supplies for most clogs.
- If the mower still won’t start after this, the carburetor likely needs a full removal and rebuild.
My neighbor Dave called me on a Saturday in April, mad at his own garage. His Toro had sat all winter with gas still in the tank. He pulled the cord twenty times. Nothing. Just a cough, a little blue smoke, then silence.
I’ve seen this same scene more times than I can count. Old gas turns into a sticky brown mess inside the carburetor. It clogs the tiny idle jet, and the engine won’t idle or start.
The good news: you often don’t need to pull the whole carburetor off the engine to fix this. This guide walks you through how to unclog a lawn mower carburetor without removing it, using tools most homeowners already own.
This is for you if you’ve got a Briggs & Stratton, Honda, Toro, or Craftsman mower that ran fine last fall and now won’t start. It’s not for engines with a cracked carb body or a mower that was already running rough before winter.
I’ve been fixing small engines for over a decade, mostly out of my own garage. Neighbors bring me their mowers, their trimmers, even the occasional generator. Nine times out of ten in early spring, the problem is the same: a clogged carburetor from fuel that sat too long.
You don’t need a mechanic’s certification to fix this. You need patience, a can of carburetor cleaner, and about an hour on a Saturday morning. That’s it.
Why Carburetors Clog in the First Place
Carburetors clog because fuel breaks down and leaves behind a sticky residue in the tiny passages inside. That residue blocks the idle jet, the small hole that controls fuel flow at low engine speed.
Think of the carburetor like a tiny plumbing system for gas and air. Fuel travels through narrow channels, mixes with air, and gets pulled into the engine. Any one of those channels can clog, but the idle jet clogs first because it’s the smallest.
Dust and small debris play a role too, though a much smaller one than fuel breakdown. A dirty air filter lets grit into the carburetor throat over time, and that grit mixes with fuel residue to form an even tougher clog.
Old Gas and Ethanol Buildup
Most gas at US pumps contains up to 10% ethanol. Ethanol absorbs water from the air, and it breaks down faster than pure gasoline (U.S. Department of Energy, 2024).
When ethanol fuel sits for more than 30 days, it starts to separate. The ethanol and water sink, and a gummy varnish forms on the carburetor walls. This varnish hardens like dried honey.
I’ve scraped this stuff out of a hundred carburetors. It smells sour, almost like old paint thinner. Once it dries in the idle jet, no amount of choke or throttle will push fuel through.
The idle jet is tiny, often smaller than the tip of a pen. It doesn’t take much varnish to plug it completely. That’s why a mower can run fine one weekend and refuse to start the next, especially after a few weeks of sitting.
Straight gasoline, without any ethanol, breaks down too, but much slower. That’s why some small engine owners switch to non-ethanol fuel for anything that sits between uses, like a backup generator or a mower that only runs seasonally.
Sitting Idle Over Winter
A mower stored with a full tank of old gas is a setup for a clog. The fuel doesn’t move, so it has nothing to do but break down.
Even half a tank causes trouble. The empty space in the tank lets more air in, which speeds up oxidation. By spring, the carburetor bowl often has a thin layer of sludge at the bottom.
I always ask people one question when they call about a no-start mower: “When did you last run it?” If the answer is anything past October, old fuel is my first guess before I even open the garage door.
Cold garages make this worse too. Temperature swings between a cold night and a sunny afternoon cause condensation inside the tank. That extra moisture speeds up the separation of ethanol from gasoline, which means more water sitting at the bottom of the tank by spring.
A mower stored in an unheated shed in Minnesota or the Midwest sees bigger temperature swings than one stored in a Southern California garage. That’s part of why northern owners tend to see this problem more often after winter.
Signs Your Carburetor Is Clogged
A clogged carburetor usually shows itself through a hard start, a rough idle, or weak power under load. These three signs point straight at fuel delivery problems, not the spark plug or the battery.
It helps to rule out the easy stuff first. Check that the spark plug looks clean and dry, and confirm there’s fresh gas in the tank. If both check out and the mower still won’t run right, the carburetor becomes the most likely suspect.
I always tell people to trust the pattern of symptoms over any single test. A mower that ran fine last season, sat all winter, and now won’t start cleanly almost always points to fuel, not ignition.
Mower Won’t Start
This is the classic sign. You pull the cord, the engine turns over, but it won’t fire. Sometimes it catches for a second, then dies right away.
If you smell gas but hear no real engine sound, fuel isn’t reaching the cylinder the way it should. That’s a strong clue the jet or fuel line is blocked.
I remember pulling a cord on an old Craftsman push mower probably thirty times one spring before I gave up and popped the air filter cover. Sure enough, the whole carburetor throat smelled like stale gas and had a crusty ring around the opening.
Don’t just keep yanking the cord past ten or fifteen pulls. You’ll tire yourself out and flood the spark plug with unburned fuel, which creates a second problem on top of the clog.
Rough Idle or Stalling
Some mowers start fine but die the moment you let go of the throttle. Others idle rough, almost like they’re gasping for air.
This happens because the idle jet is partly clogged, not fully blocked. Just enough fuel gets through to start the engine, but not enough to keep a smooth idle.
A rough idle feels almost like the engine is hunting for fuel, revving slightly up and down on its own. You’ll hear the pitch of the engine waver instead of holding a steady note.
If yours stalls the second you let go of the throttle trigger, that’s the clearest version of this symptom. Higher engine speed pulls fuel through a bigger opening, which can bypass a partially clogged idle jet, but idle speed can’t.
Black Smoke or Weak Power
Black smoke usually means the engine is running rich, burning more fuel than it should for the air coming in. A clogged air filter can cause this too, so check that first.
Weak power under load, like when you push the mower through thick grass, points to a partial clog. The engine gets just enough fuel to run at low load, but stalls out under strain.
I’ve watched riding mowers crawl through tall grass, engine bogging down, almost dying with every pass. The owner usually assumes it’s the blade or the belt. Half the time it’s a starved carburetor not letting enough fuel through under load.
Weak power paired with a strong gas smell is a specific combination worth noting. It usually means fuel is dribbling past a stuck float, flooding the engine slightly while still not delivering a clean, steady stream to the jet.
What You’ll Need Before You Start
You need basic hand tools, carburetor cleaner spray, and a rag, plus a well-ventilated space to work in. Nothing here requires a mechanic’s toolbox.
I’ve done this job with tools scattered across a workbench and tools laid out neatly in a row. Neat and organized always goes faster, especially with small screws that love to roll under the mower deck.
Take a photo with your phone before you remove anything. It sounds simple, but it saves you real time when you’re trying to remember which screw held the air filter cover in place.
Tools and Supplies
- A can of carburetor cleaner spray, such as CRC or Gumout brand
- A small flathead screwdriver and a Phillips screwdriver
- A pair of pliers for the fuel line clamp
- Clean shop rags, at least three or four
- A small container to catch drained fuel
- Fresh gas, ideally non-ethanol or a fresh 10% ethanol blend
- A wrench that fits the bowl drain screw, usually 1/4 inch or 5/16 inch
- Safety glasses to keep spray and debris out of your eyes
- An old towel or cardboard to lay under the mower deck
I keep most of these in a small plastic tote in the garage, labeled “small engine repair.” It saves me from digging through drawers every time a neighbor shows up with a dead mower.
Safety Precautions
Work in a garage with the door open or outside in fresh air. Carburetor cleaner fumes are strong, and gas fumes build up fast in a closed space.
Disconnect the spark plug wire before you touch anything near the carburetor. This one habit prevents the engine from accidentally kicking over while your hands are near moving parts.
Keep a fire extinguisher nearby. You’re working with an open fuel system, and a stray spark near spilled gas is a real risk.
Tip the mower carefully if you need to access the underside, and always tip it with the air filter side up. Tipping it the wrong way lets oil drain into the air filter and the cylinder, which causes a whole new set of problems.
Wear old clothes. Carburetor cleaner will ruin fabric if it drips on you, and gas smell tends to stick around in whatever shirt you’re wearing that day. I learned this one the hard way more than once.
How to Unclog It Without Removing It
You can unclog most carburetors in place by draining the old fuel, spraying cleaner into the carburetor throat and idle jet, clearing the fuel line, and working the choke and throttle to loosen debris. This sequence handles the majority of clogs caused by old ethanol gas.
Work through these steps in order. Skipping ahead to the cleaner spray without draining old fuel first just mixes cleaner into gunk that’s still sitting in the bowl, which makes a bigger mess without fixing anything.
Give yourself a full hour the first time you try this. You’ll move faster on a second or third mower once you know what to expect from each step.
Draining Old Fuel
Start by draining whatever fuel is sitting in the tank and the carburetor bowl. Old gas is the root problem, so there’s no point cleaning around fuel that’s already gone bad.
Most mowers have a drain screw at the bottom of the carburetor bowl. Place your container underneath, then loosen the screw with a wrench. Let it drip out completely.
I usually catch this fuel and check its color. If it looks cloudy or smells like varnish, that confirms the clog theory before I’ve even opened anything up.
Dispose of old fuel properly. Most auto parts stores and some fire departments accept used gasoline for recycling. Never pour it down a drain or onto the ground.
If your mower doesn’t have a visible drain screw, you can siphon fuel out of the tank instead using a turkey baster or a small hand pump. Either way, get as much old fuel out of the system as you can before moving to the next step.
Using Carburetor Cleaner Spray
With the fuel drained, remove the air filter and locate the carburetor throat, the round opening where air and fuel mix. Spray carb cleaner directly into this opening in short bursts.
Hold the spray can nozzle about two inches from the throat. Give it three or four one-second bursts, then wait 60 seconds for the cleaner to soften the buildup.
Some carburetors have a small idle jet you can access without removing the bowl. If you see a tiny brass fitting with a visible hole, spray directly into it. This targets the exact spot that usually causes the clog.
I’ve watched brown gunk drip straight out of a jet after this step. It’s oddly satisfying, like unclogging a shower drain.
Let the cleaner sit in the carburetor throat for a couple of minutes before you spray again. This gives the solvent time to break down dried varnish instead of just rinsing the surface.
Some carb cleaner cans come with a small straw attachment. Use it. The straw lets you aim directly into narrow openings instead of spraying a wide mist that mostly lands on the outside of the carburetor body.
Repeat the spray-and-wait cycle two or three times if the mower has sat for more than a few months. Heavier varnish takes more than one pass to fully break down.
Cleaning the Fuel Line and Filter
The fuel line and filter sit between the tank and the carburetor, and they trap debris before it reaches the jet. A clogged filter starves the carburetor even if the carb itself is clean.
Pinch the fuel line clamp with pliers and slide it back. Pull the line off the filter, then blow through the filter or spray cleaner through it to check for flow.
If the filter looks dark or you can’t blow air through it, replace it. A new inline fuel filter costs about $5 at any hardware store, and it’s not worth reusing a clogged one.
Reconnect the fuel line and make sure the clamp sits snug. A loose clamp here causes a fuel leak, which is its own headache.
While the line is off, check it for cracks or a hard, brittle feel. Rubber fuel line dries out over a few years, especially if the mower sits outside in the sun. A cracked line lets air into the system, which causes its own rough-running symptoms even after the clog is gone.
I replace fuel line every few years on mowers I maintain regularly, even if it looks fine. It’s a two-dollar part, and a cracked line failing mid-mow is a bigger hassle than swapping it ahead of time.
Working the Choke and Throttle
While the carburetor is open and exposed, work the choke and throttle linkage back and forth several times. This physical motion helps loosen dried gunk stuck around the linkage and butterfly valve.
Spray a small amount of carb cleaner onto the throttle shaft where it enters the carb body. Move the throttle lever through its full range ten or fifteen times.
You’ll feel the movement get smoother as the old varnish breaks up. On a bad clog, it starts stiff and gritty, then loosens into a clean, easy motion.
Check the choke plate too. It should snap shut easily when the choke lever is engaged, and swing open freely once the engine warms up. A choke plate stuck halfway open causes a hard start even after everything else is clean.
Once the linkage moves freely, put the air filter back on before you try to start the engine. Running it without a filter, even briefly, lets dust and grass clippings straight into the carburetor throat you just cleaned.
Compression Table for Cleaning Methods
Different clogs need different amounts of cleaning effort. Here’s how the common methods compare for a typical push mower carburetor.
I put this table together after years of tracking how long each type of clog actually took me to fix. Light clogs from a mower that sat for just a month or two respond fast. A mower that sat untouched for two winters in a row usually needs the full sequence, sometimes twice.
| Method | Time Needed | Tools Required | Best For |
|---|---|---|---|
| Spray cleaner only | 15–20 min | Carb cleaner, screwdriver | Light varnish, recent clog |
| Spray cleaner + fuel line/filter | 30–45 min | Cleaner, pliers, new filter | Moderate clog, filter suspect |
| Full in-place cleaning (all steps above) | 45–60 min | All tools listed | Winter storage clog, no-start issue |
| Carburetor removal and soak | 1.5–3 hrs | Full disassembly kit | Heavy sludge, stuck float |
When This Method Won’t Work
In-place cleaning won’t fix a stuck float, a torn diaphragm, or a carburetor bowl with heavy rust or corrosion. These problems need the carburetor off the engine and taken apart.
I want to be straight about this part, because plenty of guides online make it sound like spray cleaner fixes everything. It doesn’t. This method has real limits, and knowing them saves you from spraying an entire can of cleaner into a carburetor that needs a rebuild instead.
Signs You Need to Remove the Carburetor
If you’ve sprayed cleaner and worked the choke and throttle but the mower still won’t idle, the clog is likely deeper inside the carburetor body, past where a spray nozzle can reach.
A float that’s stuck shut or stuck open won’t respond to cleaner spray at all. You’ll know this if fuel either floods out constantly or never fills the bowl.
Rust flakes are another dead end for this method. If drained fuel comes out with metal flakes or an orange tint, the tank or carburetor bowl has internal corrosion that spraying won’t clear.
A cracked carburetor gasket is another sign you’re past the point of a quick spray fix. If you see fuel seeping from the seam where the bowl meets the carburetor body, no amount of cleaner inside the throat will stop that leak.
Watch for fuel dripping steadily from the bottom of the carburetor even after you’ve reassembled everything. That points to a bad float needle, a small part that seals the fuel inlet shut once the bowl fills. A worn or stuck needle lets fuel flood through no matter how clean the rest of the carburetor is.
I’ve also seen carburetors where mice built a nest inside the air filter housing over winter. If you find chewed insulation or nesting material anywhere near the carburetor, check the intake and linkage closely. Debris from a nest can jam the throttle plate in ways cleaner spray simply can’t fix.
When to Call a Small Engine Mechanic
If you’ve tried the in-place method twice and the mower still won’t start, it’s time to call a small engine mechanic. Most shops charge $60 to $120 for a carburetor rebuild, parts included.
I tell people this isn’t giving up. Some carburetors have passages too small and too deep for a spray can to reach. A mechanic with an ultrasonic cleaner and a rebuild kit can fix in an hour what you’d fight for a whole weekend.
Ask the shop for an estimate before they start work, especially on an older mower. Sometimes a rebuild costs more than the mower is worth, and a mechanic will tell you that honestly if you ask.
For a mower under five years old with a Briggs & Stratton or Honda engine, a rebuild almost always makes sense. Parts stay available for years, and the rest of the engine usually has plenty of life left.
Common Mistakes People Make
The two biggest mistakes are using the wrong cleaner and skipping the fuel filter entirely. Both lead to a mower that still won’t run right after you thought the job was done.
I see these mistakes constantly, even from people who are otherwise handy around the garage. Neither one is complicated to avoid, but both are easy to overlook when you’re eager to get the mower running again.
Using the Wrong Cleaner
Not every spray labeled “engine cleaner” is safe for a carburetor. Brake cleaner and general degreaser can damage rubber seals and plastic parts inside the carb.
Stick to products labeled specifically as carburetor cleaner or carb and choke cleaner. These are formulated to dissolve varnish without eating away at gaskets.
I made this mistake myself years ago, grabbing whatever spray can was closest on the shelf. It cleaned the gunk fine, but it left the rubber float gasket soft and swollen a week later.
Read the can before you buy it. Look for the words “safe for plastic and rubber parts” on the label. Brands like CRC, Gumout, and Berryman all make versions specifically labeled for carburetors.
Avoid anything labeled purely as a “parts cleaner” or “brake cleaner” for this job. Those are stronger solvents built for metal parts with no rubber seals nearby.
Skipping the Fuel Filter
A lot of people spray the carburetor clean, get the mower running, and skip the fuel filter step entirely. The engine runs fine for a week, then starts sputtering again.
That’s because a partially clogged filter keeps feeding small bits of debris downstream. You end up doing the same job again a month later.
Check the filter every time you clean the carburetor. It takes two minutes and saves you a repeat trip to the garage.
Some mowers hide the fuel filter inside the tank itself, attached to the end of the fuel line inside. If you can’t find an external inline filter, look inside the tank opening with a flashlight before assuming there isn’t one.
I keep a small stock of inline filters in my parts tote, sized for the most common mower brands. They’re cheap enough that replacing one every season isn’t a real expense.
Pros and Cons Table (In-Place Cleaning vs. Full Removal)
| Factor | In-Place Cleaning | Full Removal |
|---|---|---|
| Time required | 30–60 minutes | 1.5–3 hours |
| Tools needed | Basic hand tools, spray cleaner | Full disassembly kit, gasket set |
| Skill level | Beginner-friendly | Moderate to advanced |
| Fixes light-to-moderate clogs | Yes | Yes |
| Fixes stuck float or torn diaphragm | No | Yes |
| Risk of losing small parts | Low | Moderate (springs, gaskets) |
| Cost | Under $20 | $15–$40 in parts, or $60–$120 at a shop |
My Final Recommendation
If your mower sat over winter with old gas in it and won’t start now, try the in-place cleaning method first. It solves the vast majority of clogs I see every spring, and it costs you an afternoon instead of a trip to the repair shop.
Start with draining the fuel, then move through the spray cleaner, fuel line, and filter steps in order. Don’t skip the filter. That’s the step people rush past, and it’s the one that causes the problem to come right back.
If you’ve done all that and the mower still sputters or won’t idle, don’t keep fighting it. A stuck float or a cracked diaphragm needs real disassembly, and no amount of spray cleaner will fix that. Pull the carburetor, or hand it to a mechanic, and save yourself a wasted weekend.
I think about Dave’s Toro every spring now, because it’s become my go-to example when someone asks if this method actually works. Twenty minutes of draining old gas, spraying the throat, and clearing the fuel filter, and his mower fired up on the third pull. He mowed his whole yard that same afternoon.
Not every story ends that clean. I’ve had mowers where the in-place method got the engine running, but rough, with an idle that still hunted up and down. Those needed the bowl off and a full jet cleaning before they ran right. That’s the honest limit of this method, and I’d rather tell you that upfront than have you spray cleaner into a carburetor for the fifth time expecting a different result.
If there’s one habit that prevents this whole mess, it’s running the tank dry or adding fuel stabilizer before winter storage. A bottle of stabilizer costs about $10 and keeps fuel from breaking down for up to two years, according to most manufacturer labels. It’s a lot cheaper than an afternoon spent chasing a clog, and it’s the first thing I tell every neighbor who calls me in spring asking why their mower won’t start.