
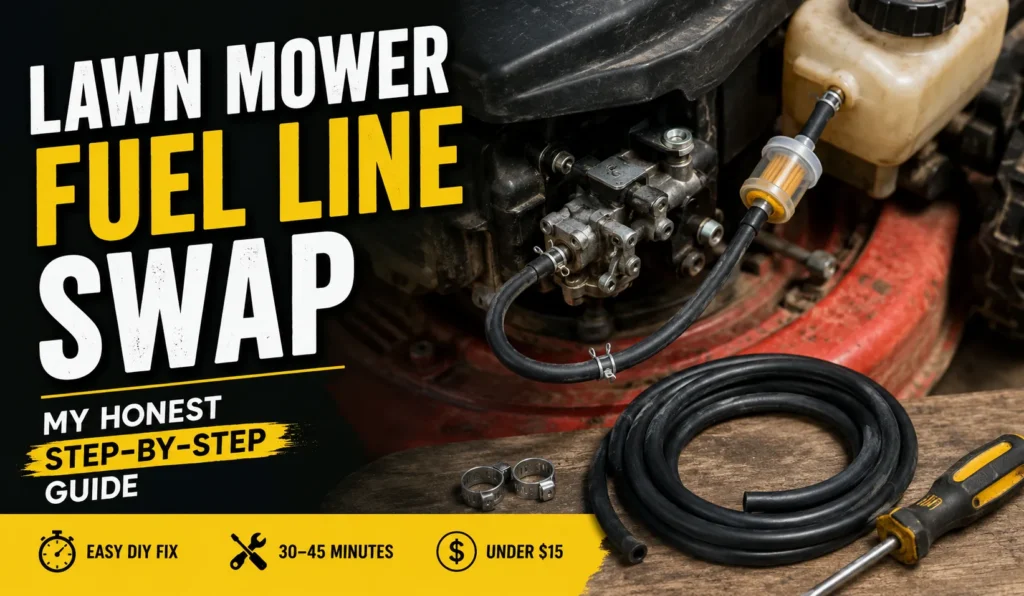
Quick Overview
- Replace your fuel line when it’s cracked, brittle, or leaking gas – most lines last 3-5 years
- The job takes 30-45 minutes with basic hand tools like pliers, a utility knife, and hose clamps
- You only need about 3 feet of ethanol-resistant fuel line hose to do the job
- This is a beginner-friendly repair – no small engine experience required
- Total cost is under $15, versus $40-$90 at a repair shop
The Smell That Told Me Something Was Wrong
I still remember the first time I caught it. I walked into my garage on a Saturday morning and smelled gas before I even saw the mower. There was a small wet patch on the concrete under the deck. That’s how most fuel line problems announce themselves.
Lawn mower fuel line swap is one of the simplest repairs a homeowner can do. I’ve done it on Toro push mowers, Craftsman riders, and Briggs & Stratton engines. The lines crack. They leak. Mice love to chew on them in storage.
This guide is for anyone with a gas mower that won’t start. Maybe it smells like fuel. Maybe there’s a wet spot under it in the morning. You don’t need to be a mechanic. You need a few tools, a new piece of hose, and about 30 minutes.
I got into small engine repair almost by accident. A neighbor’s mower wouldn’t start one spring. I offered to take a look. It turned out to be a fuel line so brittle it had cracked clean through near the tank fitting. That fix took ten minutes and a two-dollar piece of hose. Word got around the block fast after that.
Since then I’ve worked on old mowers pulled out of sheds. I’ve fixed riding mowers with lines chewed through by mice. I’ve even seen brand new units with a bad batch of hose that leaked early. The pattern is almost always the same. Someone notices a smell or a stain. Or a mower that cranks but won’t catch. Nine times out of ten, the fuel line is the cause.
What I want to do in this guide is walk you through exactly what I do, in the order I do it, with the mistakes included. Not the polished version. The real one, cracked knuckles and all.
Here’s the short version. A bad fuel line is easy to fix. It’s cheap. It’s fast. You just need to know what to check and how to check it. Let’s get into it.
Why Fuel Lines Fail (and Why You Shouldn’t Ignore It)
Fuel lines fail because they’re rubber. Rubber breaks down over time. Heat, sunlight, and ethanol fuel all attack it from the inside out. A line that looks fine one season can crack the next.
Ignoring a bad fuel line isn’t just annoying. Leaking gas near a hot engine is a real fire risk. I don’t say that to scare you. I say it because I’ve seen a scorch mark on a customer’s shed wall from exactly this problem.
A mower engine runs hot. The muffler alone can hit temperatures well above what it takes to ignite gas vapor. If a cracked line is dripping fuel anywhere near that muffler, you’re not just risking a bad mowing day. You’re risking a fire in your garage or shed.
There’s also a slower cost to ignoring it. A leaking line means you lose fuel every time you mow. That means more trips to the gas station than you should need. I’ve had customers swear their mower suddenly got worse gas mileage. Turned out a hairline crack was dripping fuel onto the ground the whole time.
And a fuel leak doesn’t stay small. What starts as a faint smell in the garage often turns into a visible puddle within a few mowing seasons. The rubber only gets more brittle with time, never less.
Think of it like a garden hose left in the sun for years. It gets stiff. It cracks. It splits. A fuel line does the same thing, just faster, because gas and heat are harder on rubber than water and sun.
Cracked, Brittle, or Leaking Lines
Most fuel lines fail in one of three ways. The rubber turns hard and brittle from age and sun exposure. Small cracks form, usually near the fittings where the hose bends. Or the line gets soft and swollen from ethanol fuel breaking down the rubber compound.
You can often spot trouble just by looking. Pull the line gently between your fingers. If it feels stiff like a dry twig, replace it. If you see white cracking on the surface, replace it too.
Mice are another common culprit. If your mower sat in a shed over winter, check the line for small chew marks. I’ve pulled apart more mouse-damaged fuel systems than I can count, mostly on mowers stored in barns or unheated garages.
One mower I worked on last fall had a line so chewed up it looked like it had been through a wood chipper. The owner thought the carb was bad. Turned out mice had been nesting behind the engine shroud all winter. The fuel line was their favorite chew toy. Ten minutes with a flashlight would have caught it sooner.
Ethanol fuel deserves its own mention here. Most gas stations sell E10, which is gas blended with 10 percent ethanol. Ethanol is harder on rubber and plastic parts than pure gas. Older fuel lines break down even faster when they’re constantly exposed to it.
If your mower sits with a full tank of ethanol fuel for months at a time, the line ages faster than it would with regular use. That’s part of why fuel line swap is such a common repair on mowers that only get used in season.
Is It Actually the Fuel Line or Something Else?
Before you replace anything, make sure the fuel line is really the problem. A mower that won’t start could have a dirty carb, a bad spark plug, or old fuel gumming things up.
Here’s my quick test. Look for wet spots under the mower, near the tank or carb. Check for a strong gas smell even when the engine is off. Squeeze the primer bulb and watch for fuel seeping out around it instead of going into the carb.
If you see cracks, dampness, or a visible drip anywhere along the hose, you’ve found your answer. If the line looks fine but the mower still won’t run right, the problem is probably somewhere else, like a clogged fuel filter or old gas in the tank.
I always tell people to rule out old fuel first. Gas that’s sat in a tank for more than a month starts to break down. It can gum up the carb and cause a no-start that has nothing to do with the fuel line at all. If your mower has been sitting since last fall, drain the old gas before you assume the worst.
Another quick check: look at the carb itself. If you see a crusty white or tan residue around the bowl, that’s usually old ethanol fuel that’s evaporated and left deposits behind. That’s a carb cleaning job, not a fuel line swap. Don’t waste a new hose fixing the wrong problem.
I’ve had a few calls over the years from folks convinced their fuel line was shot, when the real issue was a stuck fuel shutoff valve left in the closed position after winter storage. Always check that valve is open before you go further. It takes five seconds and it’s saved me from unnecessary teardowns more than once.
Tools and Materials You’ll Need
You need a new length of fuel line, a way to cut it, and something to catch the old gas. Most of this costs less than a fast food meal. I keep these supplies on a shelf in my garage. I use them often.
None of this requires a trip to a specialty store. A local hardware store or auto parts counter will have everything you need. I’ve grabbed fuel line at big box stores in a pinch. It worked fine as long as it was rated for small engines.
Don’t buy more than you need. A short trip to the store beats a pile of leftover parts on a shelf. But it never hurts to grab an extra hose clamp. They’re cheap, and you’ll use one eventually.
Fuel Line Size and Material
Fuel line comes in different inside diameters, usually 3/16 inch, 1/4 inch, or 5/16 inch. Measure your old line before buying new hose. A line that’s too small will restrict fuel flow. One that’s too big won’t seal against the fittings.
Always buy fuel line rated for small engines and ethanol fuel. Regular rubber tubing from a hardware store aisle isn’t built for gas. It will swell and fail fast. Look for hose labeled “fuel line” with an ethanol-resistant rating on the packaging.
I keep a small assortment of 3/16 inch and 1/4 inch line on hand. Those two sizes cover most residential mowers I work on. If you’re not sure which size you need, bring the old piece of line with you to the store and match it up in person. Guessing by eye is how you end up back at the store a second time.
Buy a little more line than you think you need. A three-foot section costs almost nothing extra. It’s better to have leftover hose than to come up short halfway through the job.
Other Tools for the Job
- A pair of small pliers or hose clamp pliers
- A sharp utility knife or hose cutter
- A small container to catch leftover fuel
- Rags for cleanup
- Swap hose clamps, if your mower uses them instead of friction fit
I also keep a pair of nitrile gloves handy. Gas dries out your skin fast. I don’t love the smell lingering on my hands for the rest of the day.
A small flashlight or headlamp helps too. Fuel lines often run in tight spaces under the deck or behind the carb. Good lighting makes the whole job faster. I’ve fumbled around with a phone flashlight before. A proper headlamp beats that every time.
If your mower is a riding model, you may also want a small drain pan with a wider opening. Riding mower tanks hold more fuel. A narrow oil-change pan can overflow faster than you’d expect.
Comparison Table of Fuel Line Types
| Line Type | Best For | Notes |
|---|---|---|
| Standard rubber fuel line | Older mowers, non-ethanol fuel | Cheapest option, wears out faster |
| Ethanol-resistant fuel line | Most modern mowers | Handles E10 gas without swelling |
| Clear fuel line | Mowers with visible fuel flow | Lets you see the fuel moving, but degrades from UV faster |
| Braided/reinforced line | High-vibration engines | More durable, slightly pricier |
Step-by-Step: How I Replace a Fuel Line
This is the exact process I use in my own garage. It works the same whether you’re on a push mower or a riding mower with a slightly longer line.
I’ve broken it into five steps. None of them are complicated on their own. The whole job usually takes me under 30 minutes once the new hose is cut and ready to go.
Step 1 – Prep and Safety First
Work outside or in a well-ventilated garage with the door open. Gas fumes build up fast in a closed space. You don’t want to be breathing them for half an hour.
Disconnect the spark plug wire before you touch anything fuel-related. This is the step I see beginners skip most often. A mower can kick over unexpectedly even when you think it’s off. That’s how fingers get hurt.
Let the engine cool completely if it’s been running. I learned this one the hard way early on, resting my forearm against a hot muffler while reaching for the fuel line. Not a mistake I made twice.
Lay down an old towel or cardboard under the work area. Gas drips are inevitable during this repair. It’s easier to protect the concrete than to scrub a stain out later. I keep a stack of old towels in the garage just for jobs like this.
Take a minute to look at the whole fuel path before you touch anything. Trace the line from the tank to the carb with your eyes. Note where it bends, where it’s clamped. Whether it passes near the muffler or any other hot part. This quick visual check saves confusion later.
Step 2 – Draining the Old Fuel
The easiest way to drain the tank is to run the mower until it’s nearly empty before you start. If that’s not possible, use a siphon pump or turn off the fuel shutoff valve if your mower has one.
Have your catch container ready before you disconnect anything. The moment you pull the old line off, fuel will start dripping, sometimes faster than you expect. I always keep an old oil pan underneath for exactly this reason.
Dispose of old gas properly. Don’t pour it down a drain or dump it in your yard. Most auto parts stores or local hazardous waste centers will take small amounts for free.
If your mower doesn’t have a shutoff valve, tip it carefully so the fuel drains toward the outlet you’re planning to open first. A little bit of gravity goes a long way here. I usually prop the front wheels up on a couple of wood blocks to angle the tank.
Keep a rag nearby the whole time. Fuel almost always finds a way to drip somewhere you didn’t expect, whether that’s down the side of the tank or off your fingers. Wiping up as you go keeps the smell down and the workspace safer.
Step 3 – Removing the Old Line
Locate both ends of the fuel line: one at the tank, one at the carb. Some mowers also run the line through a fuel filter in between.
If your mower uses hose clamps, loosen them with pliers or a small screwdriver before pulling the line off. If it’s a friction-fit line, a gentle twisting motion usually works it loose.
Take a photo before you remove anything if the routing looks complicated. I still do this on mowers I haven’t worked on before. It saves guesswork later when you’re installing the new line.
Note the fuel filter’s position if your mower has one. This is the step I forgot the very first time I did this repair. I ended up reinstalling the filter backward. The mower ran, but rough, until I caught my mistake.
Once both ends are loose, pull the old line free and set it aside. Inspect it one more time. This is a good moment to confirm your diagnosis. If the cracks are obvious under good light, you’ll know you made the right call replacing it.
Check the fittings on the tank and carb for any old, hardened rubber left behind. Sometimes a bit of the old line stays stuck to the fitting. Clean it off with a fingernail or small pick so the new line seats properly.
Step 4 – Installing the New Line
Cut your new fuel line to match the length of the old one, with a small amount of extra length for a clean fit. I usually add about half an inch on each end.
Push the new line onto the fitting at the tank first, then route it the same way the old line ran. Push it on firmly. It should feel snug, not loose.
Reconnect at the carb, threading it through the fuel filter if your mower has one. Secure both ends with hose clamps if your mower uses them. Make sure the friction fit is tight if it doesn’t.
Double check the routing. The line shouldn’t touch the muffler or any hot engine parts anywhere along its path. I’ve seen lines melt from resting against a hot cylinder for even a few minutes.
If the fit feels too tight going onto the fitting, a small dab of water on the inside of the hose can help it slide on without damaging the rubber. Don’t use oil or any petroleum product for this. It can weaken the hose material over time.
Use zip ties to keep the line tucked away from moving parts if your mower doesn’t already have a bracket for it. I do this on mowers where the line runs anywhere near the blade engagement cable or the wheel height levers. A stray fuel line rubbing against a moving cable will wear through eventually.
Step 5 – Testing for Leaks
Reconnect the spark plug wire and refill the tank with fresh fuel. Old gas that’s been sitting for months is often part of the original problem. Don’t reuse it.
Squeeze the primer bulb a few times and watch both fittings closely. Any dripping or wet spots mean a connection isn’t seated right. Push the line further onto the fitting or tighten the clamp.
Start the mower and let it idle for a couple of minutes. Watch the fuel line the entire time. If everything stays dry, you’re done. That first clean start after a repair like this still feels satisfying every single time.
Give the mower a real test after the idle check. Push it around the driveway or run it over a small patch of grass. Vibration from actual operation sometimes reveals a loose connection that looked fine at idle.
Come back and check the line again after the mower has cooled down. Rubber contracts slightly as it cools. A fitting that looked snug when warm can sometimes loosen a touch. A five-minute follow-up check the next day is cheap insurance against a slow leak.
Mistakes I’ve Made (So You Don’t Have To)
I’ve made plenty of mistakes on this repair over the years. Here are the ones worth knowing about before you start. None of these ruined a mower permanently. Each one cost me extra time I didn’t need to spend.
Wrong Line Diameter
Early on, I grabbed a length of hose that looked close enough without measuring first. It was too big and wouldn’t seal against the fitting no matter how hard I pushed. Always measure the old line’s inside diameter before you buy anything.
I ended up making a second trip to the store that day, hose in hand, feeling a little embarrassed about it. Now I always bring the old piece with me. Measure it with calipers before I even leave the garage.
A line that’s slightly too small can be just as bad. It might slide onto the fitting, but it won’t seal well. You’ll get a slow leak or air getting sucked into the fuel system. Either way, matching the diameter exactly is worth the extra two minutes it takes to check.
Forgetting the Fuel Filter
I mentioned this above, but it’s worth repeating. If your mower has an inline fuel filter, note which direction it faces before removing it. Most filters have an arrow printed on the side showing fuel flow direction. Install it backward and the mower will run poorly or not start at all.
The first time this happened to me, the mower actually started. It just ran rough, sputtering at higher throttle like it wasn’t getting enough fuel. I spent twenty minutes checking the carb before I remembered the filter and found the arrow pointing the wrong way.
Now I take a photo of the filter orientation before removing it, every single time. It’s a small habit that’s saved me from repeating that mistake since.
Comparison Table of Common Mistakes
| Mistake | What Happens | How to Avoid It |
|---|---|---|
| Wrong line diameter | Poor seal, leaks, or fuel restriction | Measure old line before buying new hose |
| Fuel filter installed backward | Rough running or no start | Check the arrow on the filter housing |
| Line touching hot engine parts | Melted or warped hose | Route line away from muffler and cylinder |
| Skipping the spark plug disconnect | Risk of accidental engine kickback | Always disconnect before starting work |
| Reusing old gas | Hard starting, clogged carb later | Drain and refill with fresh fuel |
When to DIY vs. Call a Repair Shop
Most fuel line replacements are a fine DIY project for a beginner with basic tools and an hour of free time. Call a shop if the fuel tank itself is cracked, if you’re not comfortable working near gas, or if the carb also needs rebuilding.
I always encourage first-timers to try this repair themselves. The parts are cheap and the mistakes are recoverable. There’s real satisfaction in fixing a machine with your own hands. But I also understand not everyone wants to spend a Saturday afternoon smelling like gas.
If you’re dealing with a riding mower and the fuel line runs somewhere hard to reach, like under the seat pan or near the transmission, that’s a case where a shop’s lift and experience can save you some frustration. Push mowers are almost always simpler and more accessible.
Cost Comparison
Doing it yourself costs about $5 to $15 for the hose and clamps, assuming you already own basic tools. A repair shop typically charges $40 to $90 for the same job, mostly labor.
That gap adds up if you own more than one gas-powered tool. I’ve applied what I learned replacing a mower’s fuel line to a leaf blower and a small generator, using the same basic process each time.
Time and Skill Level
This repair takes most people 30 to 45 minutes once they’ve done it a first time. It’s a low-skill job. If you can use pliers and follow directions, you can replace a fuel line.
Your first attempt might take closer to an hour. That’s normal. You’re figuring out the routing and getting a feel for the fittings. The second time you do this repair, on any mower, it’ll go noticeably faster.
Pros and Cons Table (DIY vs Professional Repair)
| Factor | DIY | Professional Shop |
|---|---|---|
| Cost | $5-$15 | $40-$90 |
| Time | 30-45 minutes | 1-3 days (drop-off wait) |
| Skill required | Low | None (they do the work) |
| Learning value | You understand your mower better | None |
| Risk | Minor, if safety steps are followed | Very low |
| Convenience | You choose the timing | Depends on shop schedule |
My Final Recommendation
If your mower is leaking gas or won’t start and you suspect the fuel line, I’d try this repair yourself before paying a shop. It’s one of the easiest jobs on a small engine. The parts cost almost nothing. Even if you’ve never touched a lawn mower engine before, this is a good first project.
The one exception is if you’re dealing with a cracked fuel tank, a flooded carb, or anything beyond the fuel line itself. At that point, a shop visit makes more sense than guessing your way through a bigger repair.
I’ve replaced dozens of these lines over the years, on mowers old enough to be handed down from a father-in-law and ones fresh off the shelf at a hardware store. The process barely changes. Measure twice, buy the right hose, and take your time with the fitting connections. That’s really all it takes.
Frequently Asked Questions
How often should I replace my lawn mower fuel line?
Most fuel lines last 3 to 5 years before the rubber starts cracking. Mowers stored outdoors or in direct sun may need swap sooner.
Can I use any rubber hose as a fuel line?
No. Regular rubber tubing isn’t built to handle gas or ethanol fuel. Always use hose labeled specifically for fuel line use.
What size fuel line does my mower need?
Most residential mowers use 3/16 inch or 1/4 inch inside diameter line. Measure your old line to confirm before buying new hose.
Is it safe to replace a fuel line myself?
Yes, as long as you disconnect the spark plug wire, work in a ventilated area, and let the engine cool first. It’s a low-risk, beginner-friendly repair.
What causes a fuel line to crack?
Heat, sunlight, and ethanol fuel all break down the rubber over time. Age and mouse damage are other common causes.
Do I need to replace the fuel filter at the same time?
Not always, but it’s worth checking. If the filter looks clogged or discolored, replace it while everything is already apart.