How to start lawnmower after winter problems starts with understanding why your mower won’t start.
Spring is here. The birds are singing. The grass is growing fast. The walk leads to the shed. Everything feels ready for cutting. A hand grabs the handle. The cord gets pulled. Nothing happens. You pull again. Still nothing. It is quiet. It is frustrating. This situation is familiar. It has happened in an Ohio driveway. It has happened in a hot Florida yard. A dead mower is a pain. But do not worry. This is normal. Engines hate sitting still. Winter is hard on them.
Gas goes bad. Oil gets thick. Parts get stuck. I have fixed hundreds of mowers. I know the tricks. You do not need a shop. You can fix this at home.
It takes a few tools. It takes a little time. We will get it running. We will make it purr. Let’s get to work.
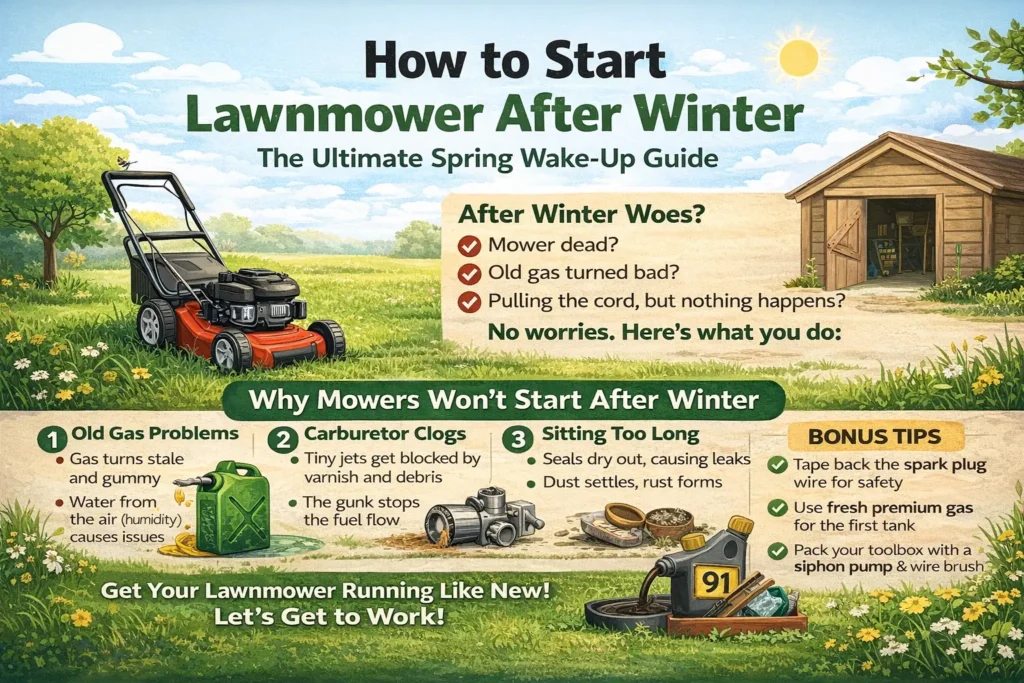
Why Your Mower Won’t Start After Sitting All Winter
I see this every single year. The sun comes out. The mowers stay dead. It is usually one small thing.
The Problem With Modern Gas (Ethanol is Tricky)
Gas is not what it used to be. It has changed. Most gas in the US has ethanol. This is corn alcohol. It is good for cars. It is bad for mowers.
What happens to gas in 30 days
- It goes stale fast: Gas has a shelf life. It is like milk. It sours.
- It turns to gum: Old gas gets thick. It looks like varnish. It smells like old paint.
- It loses its boom: The power fades. It won’t ignite well.
I once let a mower sit for three months. Just three. It would not start. I opened the tank. The smell hit me. It was sour. That was the problem. Fresh gas fixed it. It is that simple.
Why ethanol attracts water
Ethanol loves water. It pulls it from the air. Think about a cold glass of tea. It sweats. Your gas tank does the same. This happens a lot in humid places.
- Water sinks: Gas floats. Water goes to the bottom.
- The engine drinks water first: The fuel pickup is at the bottom.
- Rust forms: Water rusts the metal tank. It rusts the carb.
The “Gunk” Factor in Small Engines
The carburetor is the heart. It mixes air and gas. It has tiny holes. We call them jets. They are very small.
The tiny jets in your carburetor
- Size of a pinhead: A tiny speck can block them.
- Varnish blocks the flow: That old gas dries. It leaves a crust.
- No gas means no go: The engine starves. It tries to start. It dies.
I use a wire to clean them. A thin wire. Like a bread tie. It pushes the gunk out. It is satisfying. You feel it pop. Then the gas flows.
Why sitting is worse than running
Engines like to move. Oil coats the parts. When it sits, oil drips off.
- Seals dry out: Rubber needs oil. Without it, it cracks.
- Rust spots form: Bare metal rusts. This causes friction.
- Dust settles in: It gets into tight spots.
Cold Weather Effects on Metal and Plastic
Winter is harsh. Even in a shed. The cold changes things. I have seen plastic snap like glass.
Plastic brittleness in the Northeast
If you live up north, be careful. Cold plastic is weak.
- Don’t force buttons: Primer bulbs can crack.
- Go slow: Treat the plastic gently.
- Warm it up: Let the sun hit it first.
Metal contraction and expansion
Metal shrinks in the cold. It grows in the heat.
- Bolts get loose: This movement loosens them.
- Gaskets get crushed: Seals can fail.
- Check the deck: Tighten what you can see.
Safety First: Pre-Start Checklist
We want to cut grass. We do not want to get hurt. Please listen to this. I still have all my fingers. I want you to keep yours.
The Spark Plug Wire Rule
This is rule number one. Never touch the blade without doing this.
Always disconnect it first
- Pull the boot off: It is the black rubber cap.
- It stops accidental starts: Sometimes a spin can start it.
- It gives peace of mind: You know it is safe.
There was a scare once. It happened years ago. A blade spun unexpectedly. The engine coughed. It scared me bad. I never forgot. Now, I always pull the wire.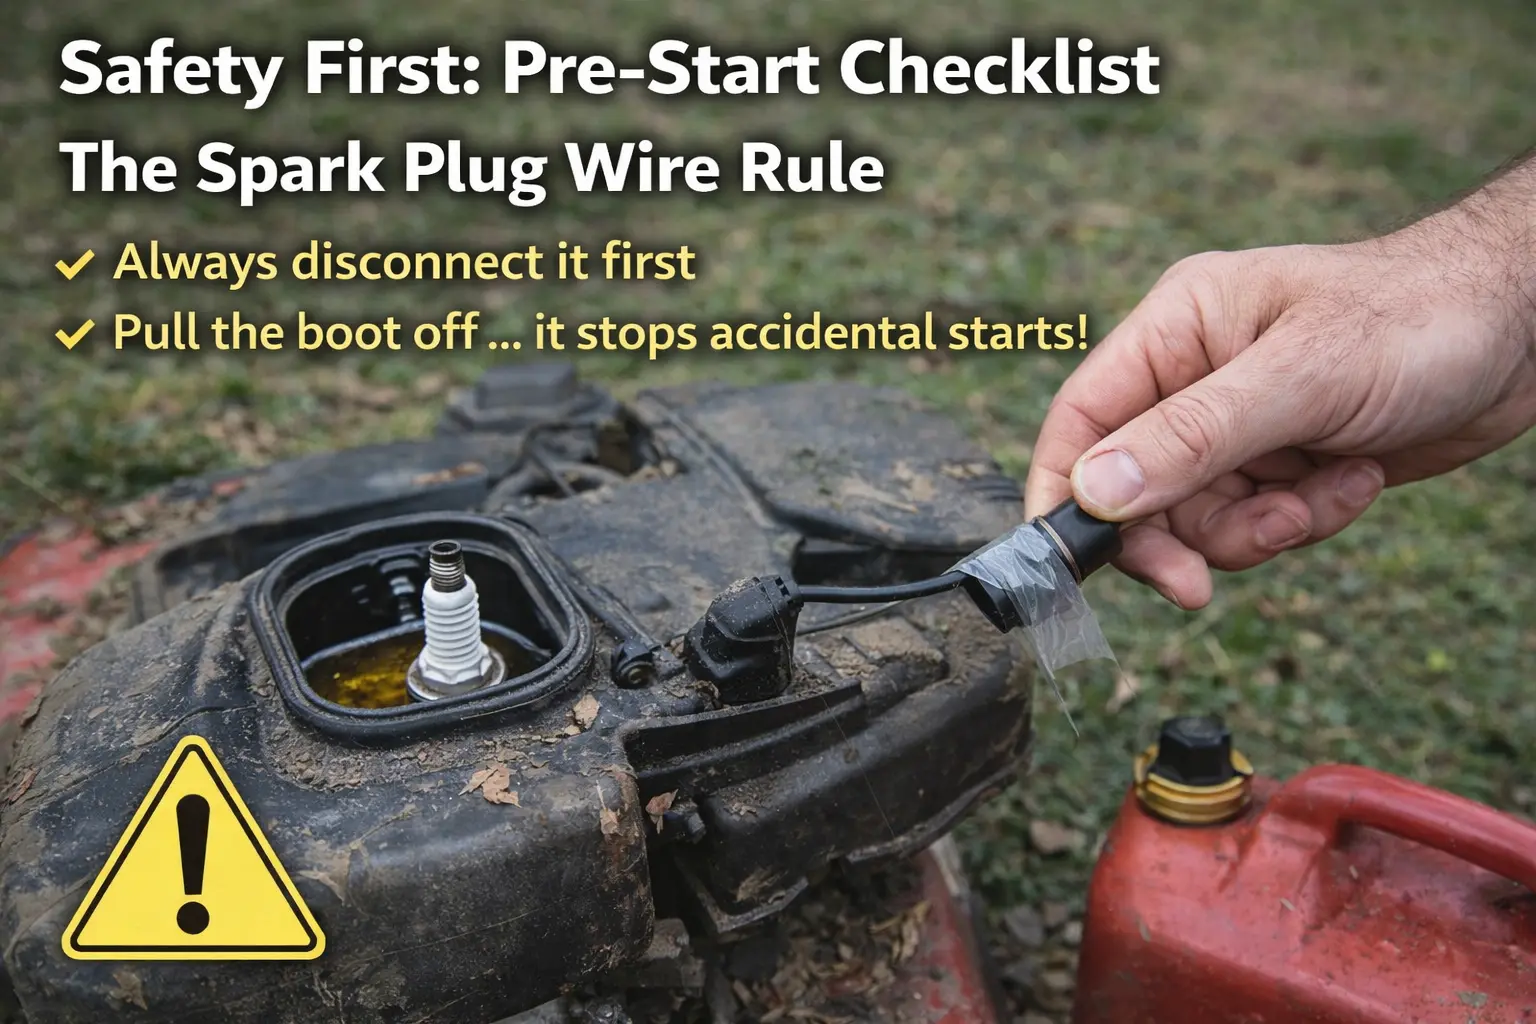
Where to tuck the wire
- Keep it away: Don’t let it dangle near the plug.
- Use tape: Tape it back if you need to.
- Make sure it can’t jump: Electricity can jump gaps.
Checking the Deck and Blade Area
Critters love mowers. They are cozy caves. I find all sorts of things.
Clearing out old mouse nests
Mice are busy in winter. They build homes.
- Look for fluff: Dry grass. Cotton. Insulation.
- Check the fins: They pack the cooling fins.
- This causes fires: Dry nests burn fast.
I found a nest made of dryer lint. It was packed tight. If I started that, it would have smoked. It might have burned the engine. Check every nook.
Ensuring the blade spins freely
- Wear thick gloves: Leather is best. Blades are sharp.
- Use a stick: Don’t use your hand first.
- Push the blade: It should spin.
- Feel for resistance: Is it stuck? Is it grinding?
Personal Gear for the Job
You are a mechanic today. Dress like one.
Eye protection matters
- Gas splashes: It stings. It is dangerous.
- Springs fly: Old parts can break.
- Rust falls: Looking under the deck drops dirt.
Gloves for grip and safety
- Gas smells bad: It stays on your skin.
- Knuckles bust: Wrenches slip. Gloves save skin.
- Grip is key: Oily hands slip.
Step 1: The Fuel System Flush
This is the big fix. This solves most problems. We need to get the bad stuff out.
Assessing the Old Gas
Open the cap. Take a whiff. Your nose knows.
The “Smell Test” method
- Good gas: Smells strong. Smells like a gas station.
- Bad gas: Smells sour. Smells like rotten fruit. Smells like varnish.
- The color test: Pour a little out. Is it dark? Is it cloudy? That is bad.
Visual check for water bubbles
Shine a light in. Not a lighter! Use a flashlight.
- Look at the bottom: Water beads up. It looks like a bubble.
- Look for debris: Dirt or rust flakes.
- Is it separated?: Does it look like salad dressing?
Draining the Tank Safely
We need an empty tank. Get the old sludge out.
Using a siphon pump
This is the best way. It is clean.
- Buy a cheap pump: They cost five dollars.
- Put the tube in: Get it to the lowest spot.
- Pump it out: Put it in a safe can.
Disconnecting the fuel line
This is messy but fast.
- Find the line: It is a black rubber tube.
- Move the clamp: Use pliers. Slide it back.
- Pull the hose: Have a pan ready. It will pour fast.
- Watch for spills: Keep rags close.
Proper disposal of old fuel
- Do not dump it: Not on the grass. Not in the drain.
- It kills grass: It kills weeds too. But it is bad for the water.
- Find a center: Take it to a recycling center. Most towns have one.
Adding Fresh Fuel and Treatment
Now we feed it. We want the good stuff.
Why high-octane helps after storage
I use premium gas. Just for the first tank.
- It burns cleaner: It helps knock out the cobwebs.
- It resists gum: It is more stable.
- It is a treat: Treat your mower to a nice meal.
The magic of fuel stabilizers
This is my secret weapon. I use Sea Foam. Or STA-BIL.
- Pour it in the can: Mix it before you fill.
- It cleans as it runs: It dissolves the gunk.
- It keeps gas fresh: It fights the ethanol.
I pour a capful in. It smokes a little at first. That is normal. That is the cleaner working. It is cleaning the valves. It is cleaning the jet.
Step 2: The Spark Plug Check
Gas is there. Now we need fire. The spark plug makes the boom.
Inspecting the Old Plug
It is hidden. Usually on the front. Look for the black wire.
How to remove it properly
- Get a socket: Usually 5/8 or 13/16 inch.
- Turn left: Lefty-loosey.
- Be gentle: Do not strip the threads. The head is aluminum. It is soft.
I once pulled too hard. I stripped the threads. It was a nightmare. I had to buy a kit. I had to drill. Don’t be like me. Turn it slow.
Reading the plug color
The plug tells a story. Look at the tip.
- Tan or Gray: This is perfect. It is healthy.
- Black and Sooty: Too much gas. Or not enough air.
- White and Blistered: Too hot. Dangerous.
- Oily: Internal problems. Rings might be bad.
Checking for wetness (Flooding)
- Is it wet? Does it smell like gas?
- It won’t fire: Wet plugs don’t spark.
- The fix: Leave it out. Let the hole air out. Dry the plug.
Cleaning vs. Replacing
I am cheap. I like to clean things. But sometimes, you just buy new.
When to wire brush it
- Light carbon: Just a little black soot.
- Use a wire brush: Scrub the tip.
- Use a file: Lightly file the metal dot.
- Spray it clean: Use carb cleaner.
Why a new plug is worth $3
- It is cheap insurance: A new plug sparks strong.
- It saves your arm: Easier starts.
- I buy in bulk: I keep a spare in the shed.
- Match the number: Check the code on the white part. Get the same one.
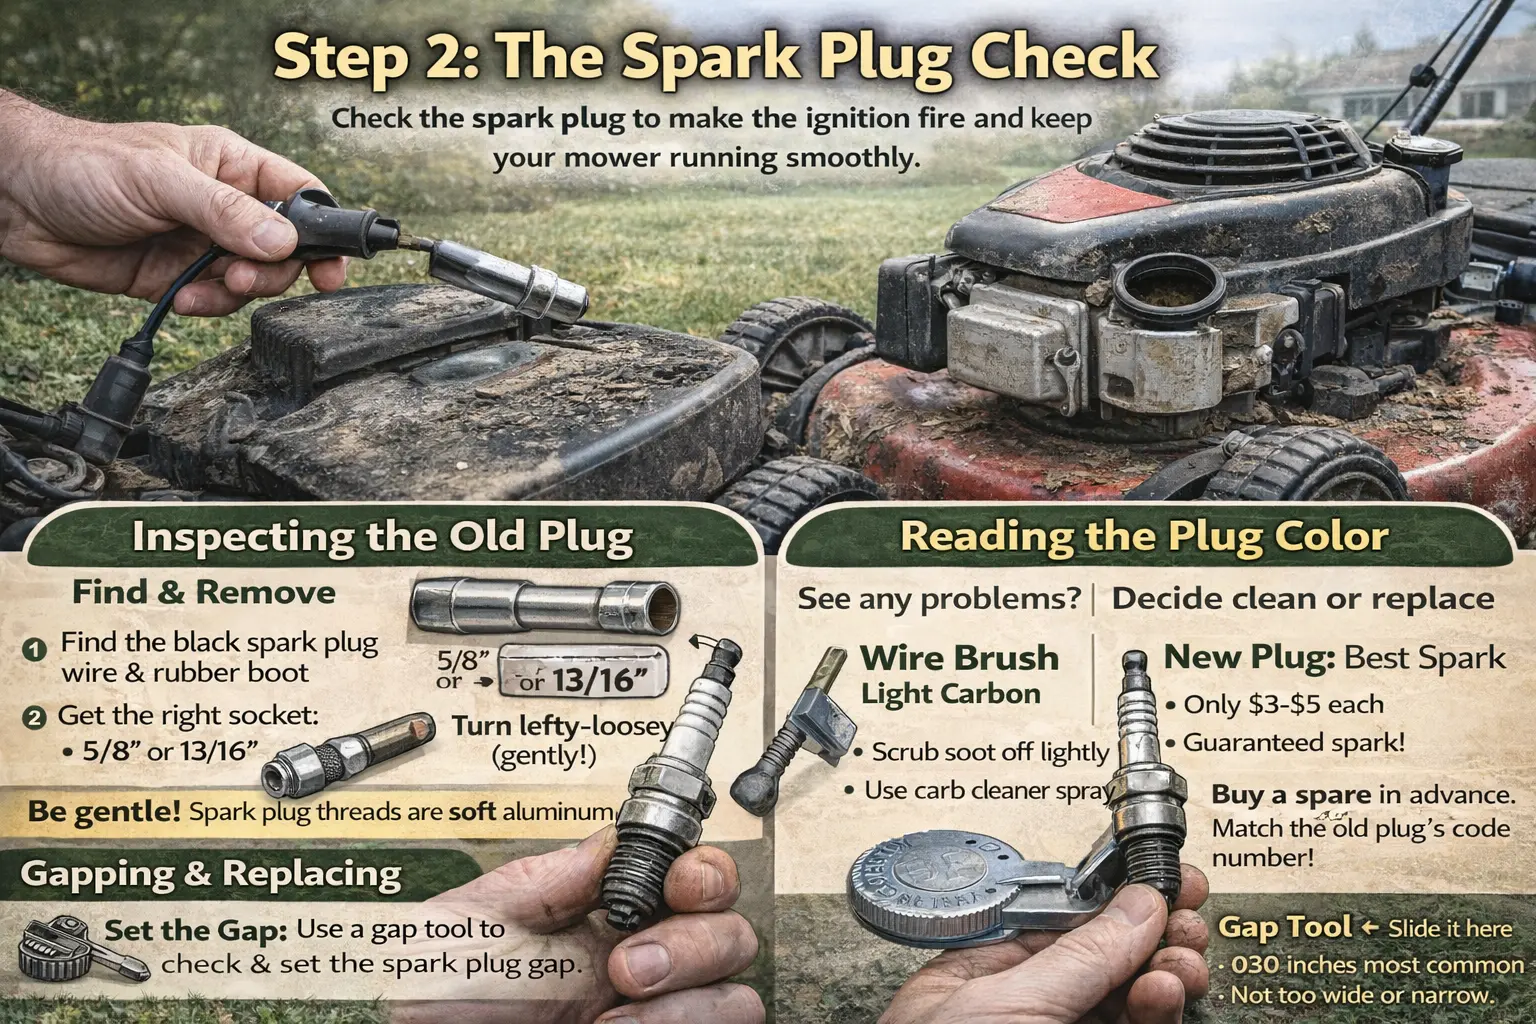
Gapping the Plug
The spark needs a jump. The gap is the distance.
Using a gap tool
- It looks like a coin: It gets thicker around the edge.
- Check your manual: Usually .030 inches.
- Slide it in: It should drag a little.
Why the gap matters
- Too wide: The spark can’t jump. No fire.
- Too narrow: The spark is weak. Poor burn.
- Adjusting it: Tap it to close. Pry it to open. Be gentle.
Step 3: Air Flow and Filters
The engine is an air pump. It sucks air in. It blows exhaust out. Dust is the enemy.
Paper Filters vs. Foam Filters
Mowers are different. Yours has one of these.
Identifying your filter type
- Paper: It looks like an accordion. It has pleats. Usually white or yellow.
- Foam: It looks like a sponge. Usually green or yellow.
- Hybrid: Some have both. A foam wrap on a paper core.
Common locations on US brands
- Briggs & Stratton: Usually a plastic box on the side.
- Honda: A clip-on cover near the back.
- Toro: Often on the front left.
- Look for the screw: Sometimes a knob. Sometimes a clip.
Cleaning a Foam Filter
These are messy. But they last forever.
Washing with soap and water
- Take it out: Don’t rip it.
- Use dish soap: Dawn works great. It cuts the grease.
- Wash it in the sink: Warm water helps.
- Squeeze it: Do not twist it! Twisting tears the foam.
- Rinse it well: Get the soap out.
- Let it dry: Put it in the sun. It must be bone dry.
Oiling the foam properly
This part is key. Dry foam stops nothing. Oiled foam catches dust.
- Use engine oil: Just a tablespoon.
- Pour it on: Put it in a bag. Squish it around.
- Squeeze out the excess: You want damp, not dripping.
- Install it: Wipe the box clean first.
Handling Paper Filters
These are disposable. Like a coffee filter.
The “Tap Test”
- Take it out: Hold it by the rubber edge.
- Tap it on the ground: Tap the flat side.
- Watch the dirt: Does dust fall out? That is good.
- Can you see light? Hold it to the sun. If light comes through, it is okay.
When to toss it
- It is oily: Oil ruins paper. It blocks air.
- It is gray: Clogged with dust.
- The rubber is cracked: Bad seal. Dust gets in.
- Just buy a new one: They are cheap. Your engine will thank you.
Step 4: The Oil Change (The Lifeblood)
I change my oil every spring. It is a ritual. Like spring cleaning.
Checking the Oil Level and Color
- Find the dipstick: It usually has a yellow cap.
- Wipe it clean: Use a rag.
- Dip and read: Check the hatch marks.
Gold vs. Black oil
- Gold/Amber: This is fresh. It is clean.
- Black/Tar: This is old. It has carbon. Change it.
- Milky/Gray: This has water. This is bad. Change it now.
Smell the dipstick
Take a sniff.
- Smells like oil: Good.
- Smells like gas: Bad. Your carb is leaking into the engine. This thins the oil. It ruins engines. Fix the carb float.
Draining the Old Oil
This can be messy. Get some cardboard. Put it under the mower.
The tilt method (Push Mowers)
Most push mowers drain from the fill tube.
- Warm it up: Run it for a minute. Warm oil flows fast.
- Disconnect the spark plug: Remember safety!
- Tilt the mower: Tip it on its side.
- IMPORTANT: Keep the air filter UP. If you tip it down, oil goes into the filter. It ruins it.
- Pour into a pan: Catch the black goo.
Using an oil extractor
I love this tool. It is a big syringe.
- Stick the tube in: Go down the dipstick hole.
- Suck it out: It pulls the oil up.
- No tipping: No mess. It is worth the twenty bucks.
Refilling with the Right Type
Don’t use car oil unless the manual says so. Small engines run hot.
SAE 30 vs. 10W-30
- SAE 30: This is standard. It is good for warm weather. 40°F and up.
- 10W-30: Good for cooler days. Or variable temps.
- Synthetic: I use synthetic. It handles heat better.
Checking the fill line
- Pour slowly: Use a funnel.
- Check often: Don’t overfill.
- Too much oil causes smoke: It blows white smoke. It fouls the plug.
- Drain some if needed: Get it right.
Step 5: The Carburetor (The Scary Part)
People fear this part. They think it is magic. It is just plumbing.
The “Magic Spray” Method
Try this first. It works 50% of the time.
Using carb cleaner spray
- Buy the can: It has a red straw.
- Remove the air filter: Expose the throat.
- Look for the hole: You will see a metal flap.
- Spray it: specific squirts into the hole.
- Clean the linkages: Spray the springs on the outside too.
Trying to start it
- Put the filter back: Or leave it off for a second.
- Pull the cord: If it roars to life, then dies, you have a fuel clog.
- The spray is fuel: It runs on the spray. It proves the spark works.
Cleaning the Bowl (Float Bowl)
This is where the gunk lives. Gravity pulls dirt here.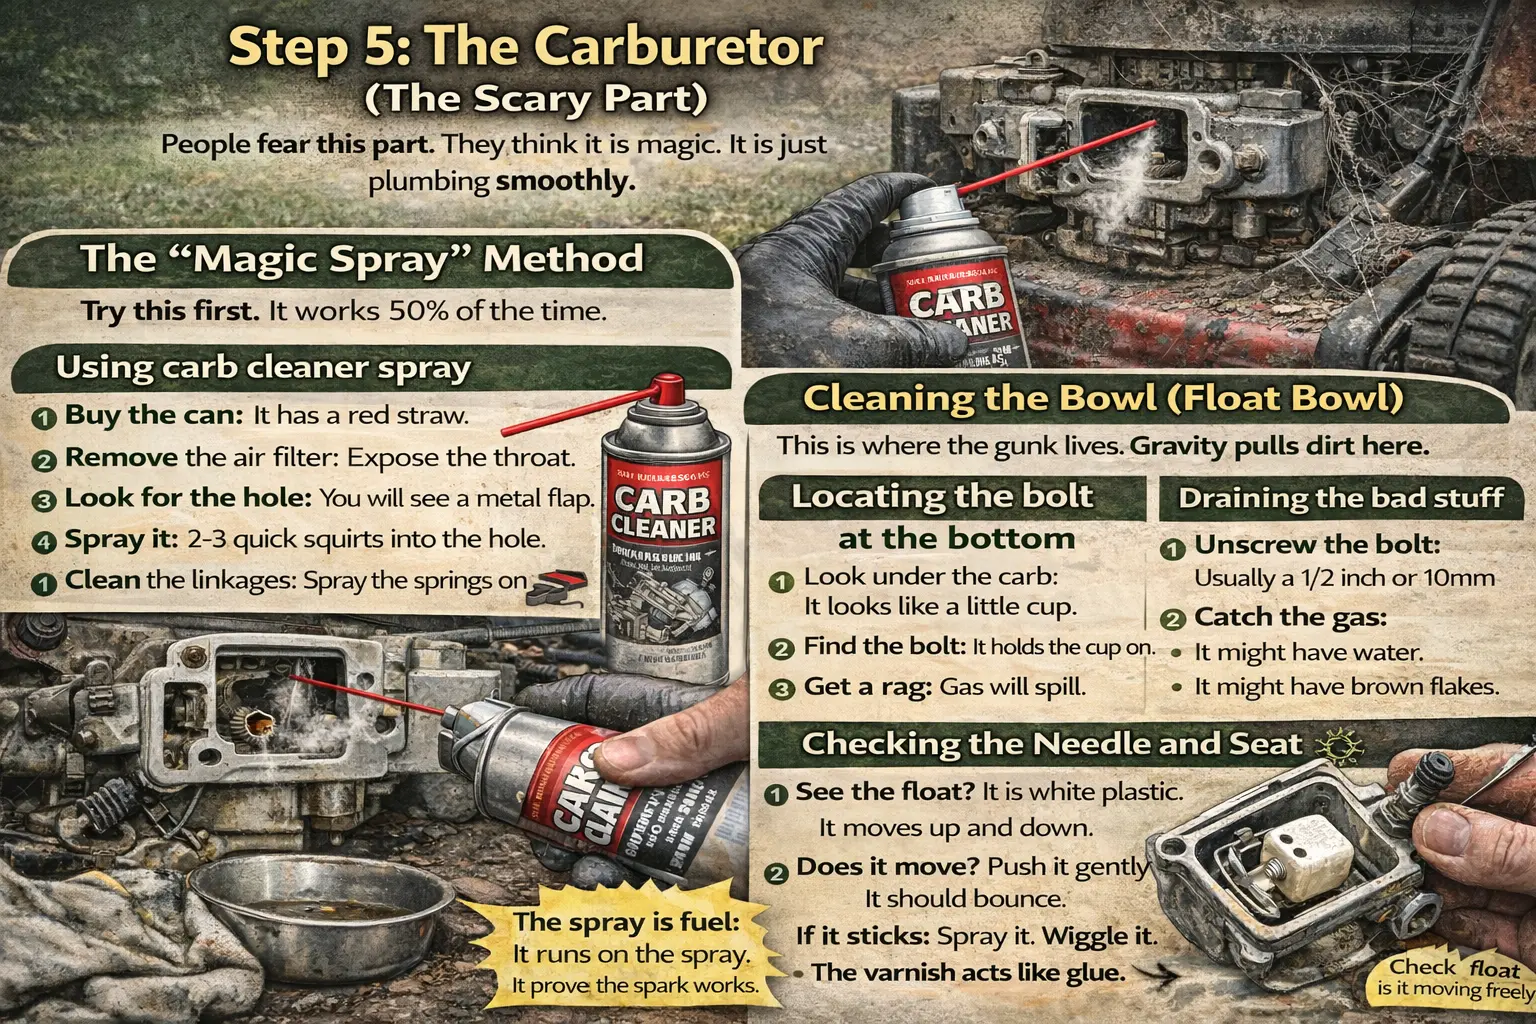
Locating the bolt at the bottom
- Look under the carb: It looks like a little cup.
- Find the bolt: It holds the cup on.
- Get a rag: Gas will spill.
Draining the bad stuff
- Unscrew the bolt: Usually a 1/2 inch or 10mm.
- Catch the gas: It might have water. It might have brown flakes.
- Wipe the bowl: Clean the inside of the cup.
- Check the bolt holes: The bolt often has holes. Clean them with wire.
Checking the Needle and Seat
- See the float? It is white plastic. It moves up and down.
- Does it move? Push it gently. It should bounce.
- If it sticks: Spray it. Wiggle it.
- The varnish acts like glue: You need to dissolve it.
I fixed my neighbor’s mower this way. He was ready to trash it. I took off the bowl. I cleaned a speck of dirt. It ran like new. He bought me a steak dinner. Best trade ever.
Step 6: Battery Care (For Riding Mowers & Electric Start)
Push buttons are nice. Until they don’t work.
Testing the Voltage
Batteries die in winter. Cold kills them.
Using a multimeter
- Set to DC Volts: The symbol is a V with a line.
- Red to Red: Positive.
- Black to Black: Negative.
- The magic number: You want 12.6 volts.
- 12.0 is low: It might click.
- 10.0 is dead: It won’t hold a charge.
Signs of a dead cell
- Bulging sides: Did it freeze?
- Cracks: Leaking acid.
- Won’t charge: You charge it all night. It is still dead. Buy a new one.
Cleaning the Terminals
- Look for white powder: That is corrosion. It blocks power.
- Mix soda and water: Baking soda. It fizzes. It eats the acid.
- Scrub it: Use a wire brush. Make the lead shiny.
- Tighten the bolts: Loose bolts cause heat. They cause weak starts.
Charging vs. Jumping
- Trickle charger: This is best. It is slow. It is gentle.
- Jump starting: You can jump it from a car.
- WARNING: Do not have the car running! The car alternator is too strong. It can fry the mower. Just use the car battery power.
Step 7: The “Priming and Pulling” Technique
There is a rhythm. A dance. You have to feel it.
The Primer Bulb Strategy
That little red button. It pushes gas.
How many pumps is too many?
- Read the sticker: It usually says “Push 3 times.”
- Cold days: Maybe 4 or 5 times.
- Warm days: Maybe 1 or 2.
- Too many floods it: The plug gets wet. Then you have to wait.
Finding the “sweet spot”
- Push it all the way: Don’t do baby taps.
- Let it pop out: Wait for it to refill.
- Feel the resistance: You can feel the gas moving. If it feels empty, the line is dry.
Using the Choke Lever
- Find the symbol: It looks like a slash line /|.
- Start position: This closes the air. It makes the mix rich.
- Run position: This opens the air.
- The mistake: Don’t leave it on choke! The engine will smoke. It will run rough. It will die. Open it as soon as it starts.
The Proper Pull Stance
Save your back. I learned this the hard way.
Hand placement on the bar
- Hold the safety bar: Squeeze it tight.
- Grip the handle: Use your dominant hand.
The short pull vs. long pull
- Don’t just rip it: You will hurt your shoulder.
- Pull slowly first: Pull until you feel the grab. That is compression.
- Then snap it: From that grab point, pull hard.
- Follow through: Pull it back past your hip.
- Don’t let go: Guide the rope back. Don’t let it snap back.
Step 8: It Starts! Now What?
You hear the pop. You hear the roar. Victory!
The Warm-Up Phase
Don’t rush to the tall grass.
Let it idle for 5 minutes
- Let the oil move: Get it to the top of the engine.
- Let the metal heat: Pistons expand. Rings seal.
- Burn off the condensation: Steam might come out. That is okay.
Listening for surges
- “Hunting”: Does it go Vroom… vroom… vroom?
- It means a clog: A partial clog. The governor is fighting for gas.
- Add more Sea Foam: Let it run. It might clear up.
Checking for Leaks
- Look down: Any wet spots?
- Check the carb bowl: Did you tighten that bolt?
- Check the oil cap: Is it tight?
Testing the Blade Engagement
- Stand back: Be safe.
- Engage the blade: Pull the lever.
- Listen: Is there a rattle? Is there a vibration?
- Wobbles are bad: You might have a bent blade. Or a loose bolt. Fix it before you cut.
Troubleshooting: If It STILL Won’t Start
You did it all. It is still dead. Don’t kick the tires. Take a breath.
The “Starter Fluid” Trick
This isolates the problem.
Where to spray it
- Into the air filter hole: Just a one-second spray.
- Pull the cord: Immediately.
What it tells you
- If it starts and dies: You have spark. You have compression. You have NO fuel. Clean the carb again.
- If it does nothing: You have NO spark. Or no compression. Check the plug again. Check the kill switch cable.
The Shear Key Check (If you hit a rock last year)
Did you hit a stump? A root?
What is a shear key?
- A soft metal key: It connects the flywheel to the shaft.
- It is designed to break: It breaks so the engine doesn’t.
Signs it is broken
- The pull back: The cord rips out of your hand. It hurts.
- The timing is off: The spark happens at the wrong time.
- The fix: You have to pull the top off. Pull the flywheel. Replace the key. It costs one dollar. It takes an hour.
When to Call a Pro
- Low compression: The rope pulls too easy. Like there is no resistance.
- Bad valves: The engine is worn out.
- Knocking sounds: A loud metal bang. The rod is broken.
- It is time: Sometimes, it is cheaper to buy new.
Pro Tips for Next Winter (So This Doesn’t Happen Again)
I want you to be happy next spring. Do this in November.
The “Dry vs. Wet” Storage Debate
People argue about this. Both work. Pick one.
Running it dry
- My favorite method: Run the mower until it dies.
- Pull the cord again: Get the last drops out.
- Why it works: No gas means no gum. The carb is clean.
Storing it full with stabilizer
- Fill it to the brim: No air space.
- Add stabilizer: Run it for 5 minutes to circulate.
- Why it works: No air means no rust. The stabilizer keeps the gas fresh.
Battery Maintenance
- Take it inside: Put it in the basement. Or a warm garage.
- Keep it off concrete: Old myth, but shelves are cleaner.
- Charge it mid-winter: Give it a boost in January.
Fogging the Cylinder
- What is it? A sticky oil spray.
- Remove the plug: Spray into the hole.
- Pull the cord slowly: Coat the walls.
- Why? It stops the rings from rusting to the wall. It lubes the start next year.
That is it. That is the guide. You have dirty hands now. But you have a running mower. The grass is waiting. Go make your yard look great. Enjoy the smell of fresh cut grass. There is nothing like it. Good luck!
FAQs for how to start lawnmower after winter
Why won’t my mower start after winter?
Old gas is the top cause. Fuel turns to gum in the tank. This clogs the tiny jets. Drain the bad gas safely. Add fresh fuel to start the lawnmower after winter.
Do I need to change the oil in spring?
Yes, do it now. Winter oil gets thick and sludge forms. Dirty oil hurts the motor. Fresh oil keeps it cool. It helps the parts move smooth and last longer.
How do I check the spark plug?
Unscrew it and look at the tip. Is it black or wet? That is bad. A clean plug sparks hot. Replace it if it looks worn. It costs less than five dollars.
Is fuel stabilizer necessary for mowers?
Yes, modern gas goes bad fast. It pulls water from the air. Stabilizer stops this mess. It keeps the fuel fresh. Use it to help start the mower easily.
How many times should I press the primer?
Press the red bulb three times. Feel the gas move in the line. Do not pump too much. Flooding the engine makes it wait. A firm push helps it wake up.
Final Thoughts on Your Mower Maintenance
If you value a reliable cut, learning how to start lawnmower after winter is key. This DIY fix is perfect for saving cash and time. However, if you hate getting dirty, a repair shop is a valid choice. From my experience, a little care now saves big headaches later.
Read More: Lawnmower Blades Reverse Threaded