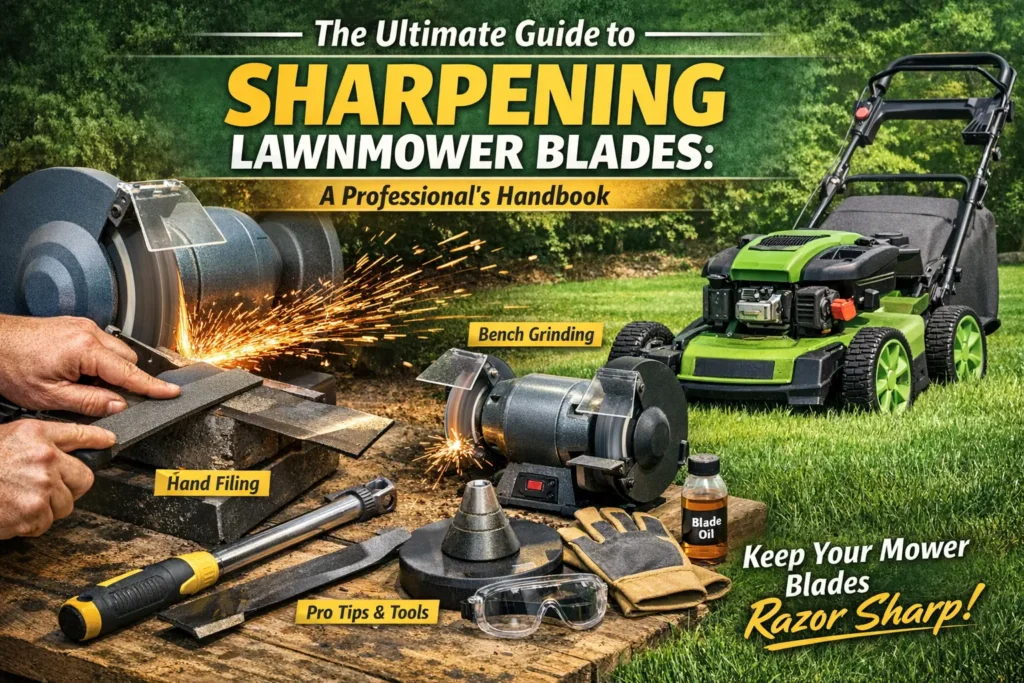
I was cutting tall fescue in my backyard in humid Georgia last July. It was hot. The air smelled like rain. Suddenly, I hit a hidden tree root. Clang! The mower shuddered. I felt it in my bones. I knew right then the edge was gone. If you own a home, you know this feeling. Knowing how to sharpen lawnmower blades isn’t just a chore. It is an art.
A sharp blade cuts clean. It keeps the grass green. A dull one tears the leaf. It leaves jagged, brown tips. That invites disease. I have fixed up old Toros in Ohio winters. I have fixed brand new John Deeres in Texas heat. I know what works. You don’t need a fancy shop. You just need a few tools and some patience. Let’s get your mower cutting like new again.
Why a Sharp Blade is Critical for Your American Lawn
I have seen too many brown lawns in the suburbs. It usually isn’t the heat. It is a dull blade tearing the grass.
The Science of the Cut
A sharp blade slices. It makes a clean cut. This heals fast. A dull blade acts like a bat. It bashes the grass.
Shearing vs. Tearing
Think of a chef’s knife. I use them daily. A sharp knife glides. A dull knife mashes. Your mower is the same.
- The clean slice: This seals the grass tip. It keeps moisture in.
- The dull impact: This shreds the tip. The grass loses water.
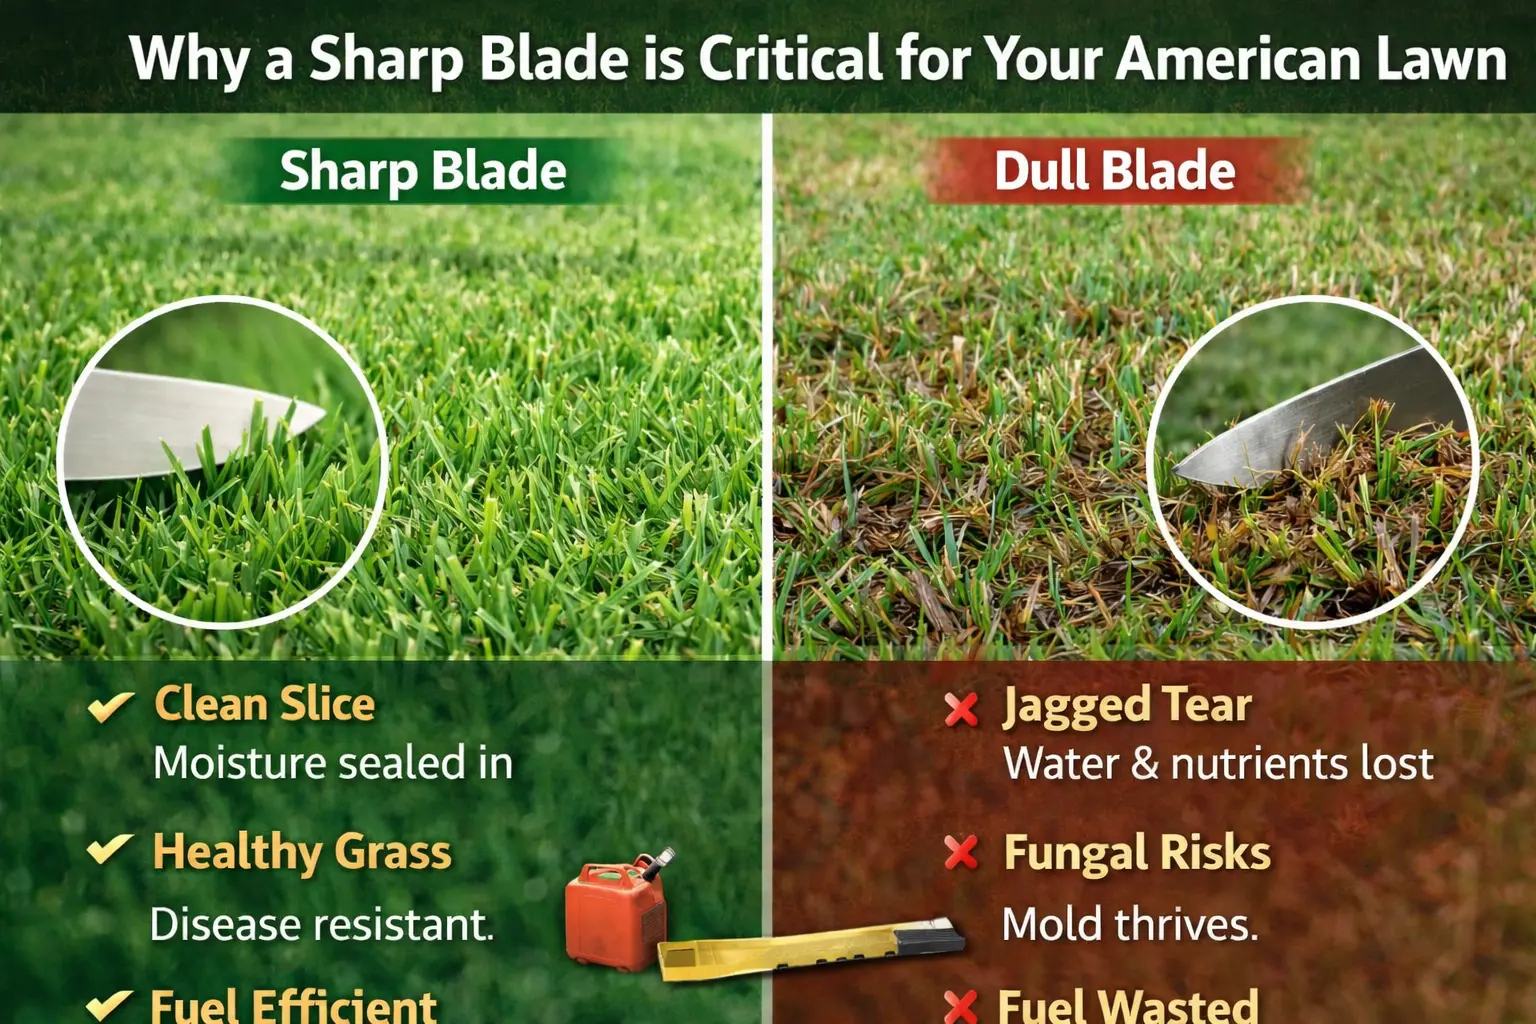
A side-by-side comparison showing how a sharp lawnmower blade creates a clean cut while a dull blade tears grass and damages the lawn.
Grass Health and Disease Susceptibility
I saw a lawn in Florida once. It looked gray. We call it the “White Haze.” It happens when tips are shredded.
- Fungal risks: Shredded tips rot. They invite mold.
- Brown tips: The lawn looks dead. But only the top is dead.
Fuel Efficiency and Engine Load
A dull blade drags. It fights the grass. I tested this on my old push mower.
- Hard work: The engine roars louder. It burns more gas.
- Gas prices: We all pay enough at the pump. Don’t waste fuel.
- Wear and tear: It puts stress on the shaft. That costs money to fix.
Safety First: Preparing for the Job
Don’t skip this. I almost lost a thumb once because I was in a rush. Respect the machine.
Immobilizing the Engine
The engine can start if the blade spins. It is rare, but it happens. I never take that risk.
The Spark Plug Rule
This is step one. Find the black wire on the front or side.
- Pull the boot: Yank the rubber cap off the plug.
- Tuck it away: Make sure it can’t snap back. I tape it sometimes.
Battery Safety for Electric Mowers
I see more electric mowers now. EGO and Ryobi are popular. They are great tools.
- Remove the battery: The button is the trigger. If the battery is in, it is live.
- Take the key: Most have a plastic safety key. Pull it out.
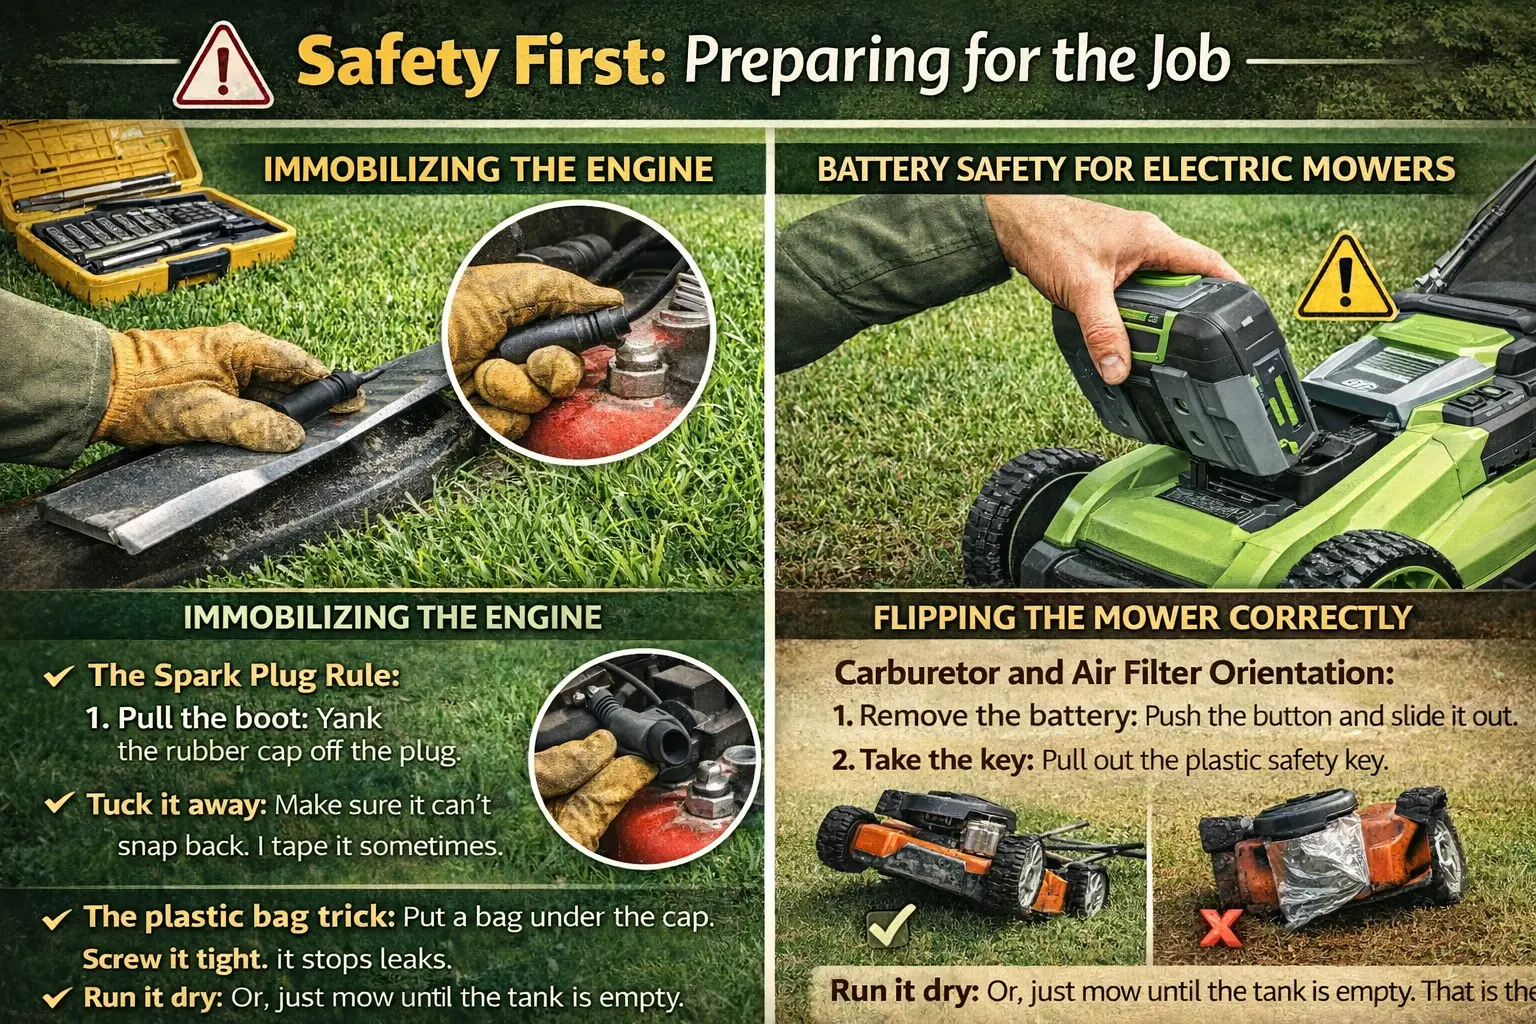
Essential lawnmower safety steps including disconnecting the spark plug, removing the battery, and flipping the mower correctly before maintenance.
Flipping the Mower Correctly
Gravity is not your friend here. Oil and gas can spill. It makes a huge mess.
Carburetor and Air Filter Orientation
Look for the air filter. It is usually a plastic box on the side.
- Carb up: Always tip the mower so the filter is up.
- Oil flow: If you tip it down, oil fills the filter. The mower won’t start later.
Gas Cap Seals
I learned this the hard way on a driveway in Texas. Gas eats asphalt.
- The plastic bag trick: Put a bag under the cap. Screw it tight. It stops leaks.
- Run it dry: Or, just mow until the tank is empty. That is the safest way.
Assessing Your Blade: Grind or Replace?
Sometimes the metal is just too gone. I looked at a blade last week that was thin as paper.
Signs of Irreparable Damage
You cannot fix everything. Sometimes you need to spend twenty bucks on a new one.
Deep Cracks and Gouges
Look at the metal. Do you see lines?
- Stress fractures: Look near the center hole. These are dangerous.
- Big dents: If a rock took a huge chunk, toss it.
The “Paper Thin” Edge
I see this on old mowers. The owner sharpened it too many times.
- The trailing edge: This is the back of the fin. If it is sharp, it is worn out.
- Shatter risk: Thin metal breaks. It becomes shrapnel at 3000 RPM.
Bent Blades
I hit a pipe once. The mower shook like a washing machine.
- The eye test: Look at the blade from the side. Is it level?
- Uneven cuts: Does one side of your lawn look lower? That means the blade is bent.
Removing the Blade Like a Pro
That bolt can be stubborn. I once broke a socket wrench trying to loosen a rusted bolt in a damp Florida garage.
Locking the Blade
The blade wants to spin when you turn the wrench. You have to stop it.
The Wood Block Method
This is my favorite trick. It costs nothing.
- Get a 2×4: A scrap piece of wood works best.
- Wedge it: Jam it between the blade and the deck.
- Save your hands: Never hold the blade. It will cut you when the bolt breaks free.
Specialized Blade Locking Tools
You can buy plastic clamps. They work well.
- Are they worth it? Only if you do this a lot.
- Clamp backup: A C-clamp on the deck edge works too.
Loosening the Bolt
Bolts get stuck. Grass juice acts like glue. Rust makes it worse.
Righty-Tighty, Lefty-Loosey (Usually)
Most bolts turn left to loosen. But check your manual.
- Reverse threads: Some brands do this. You have to turn right to loosen.
- Mark it: I write “Loosen ->” on the deck with a marker.
Using Leverage
My standard ratchet was too short. I couldn’t budge it.
- Breaker bar: This is a long handle. It gives you power.
- PB Blaster: Spray this oil on the bolt. Let it sit for ten minutes. It eats rust.
Method 1: The Hand File (Old School Precision)
I love the sound of a file on steel. It’s quiet. You can feel the metal shaping under your hand.
Choosing the Right File
Don’t use a wood file. You need a file made for metal.
Mill Bastard File Specs
Go to the hardware store. Look for a “Mill Bastard” file.
- Length: Get a 10-inch file. It gives you a long stroke.
- The grain: It bites into the steel. It leaves a smooth edge.
The Sharpening Technique
Clamp the blade in a vise. Make sure it is tight.
Finding the Factory Angle
Look at the edge. It is slanted.
- Match the slant: It is usually 30 degrees. Hold your file at that angle.
- Top side only: Never file the flat bottom side. That ruins the lift.
Stroke Consistency
This is where the “chef” in me comes out. Be smooth.
- Push only: Push the file away from you. Lift it up on the way back.
- Count them: I do 30 strokes. Then I check.
- Even sides: Do 30 strokes on the other end too. This helps balance.
Method 2: The Bench Grinder (Speed and Power)
If you have a big property and hit rocks often, this is your best friend. Just don’t overheat the steel.
Setting Up the Grinder
This machine spins fast. Wear safety glasses. Sparks will fly.
Wheel Selection
You have two wheels usually. One is rough. One is smooth.
- Medium grit: Use the smoother stone. The rough one eats too much metal.
- Check the guards: Make sure the plastic shields are clear.
Managing Heat
This is the biggest risk. Friction makes heat. Heat ruins the temper.
The Temper of the Steel
Steel is hard because of heat treatment.
- Blue is bad: If the edge turns blue, you burned it. It is now soft.
- Soft edges: A soft edge dulls in five minutes.
Using Water
I keep a coffee can of water on the bench.
- Dip it: Grind for two seconds. Dip the blade in water. Listen for the sizzle.
- Cool to touch: If you can’t touch it, it is too hot.
Method 3: Drill Attachments (The DIY Shortcut)
These are popular at hardware stores. They are okay for a quick touch-up, but they have limits.
How They Work
It looks like a stone with a plastic shield. You put it in your drill.
The Stone and Guide
The plastic guide rests on the back of the blade.
- Auto-angle: It sets the angle for you. That is handy.
- Drill speed: Run the drill at full speed.
Pros and Cons
I use this mid-season. It is fast. But it is not perfect.
Speed vs. Quality
- The good: You can sometimes leave the blade on the mower. (But be careful!)
- The bad: The stone wears out fast. It follows bumps instead of fixing them.
Method 4: Angle Grinder (The Contractor’s Choice)
This is fast but risky. I use it on commercial mowers. You need a steady hand.
Disc Selection
Don’t use a stone disc. It bounces too much.
Flap Discs vs. Grinding Wheels
I swear by flap discs. They look like sandpaper layers.
- 60 grit: This is the sweet spot.
- Smoother cut: It grinds cool. It doesn’t gouge the metal.
Technique for Stability
Hold the grinder tight. It has a lot of torque.
Securing the Blade
You must use a heavy vise. The blade cannot move.
- Keep moving: Don’t stay in one spot. Sweep the grinder across the edge.
- Light touch: Let the tool do the work. Don’t push down hard.
The Critical Step: Balancing the Blade
An unbalanced blade vibrates. It ruins your engine bearings. It feels like the mower is shaking apart.
Checking Balance
You removed metal. Maybe you took more off the left side.
The Nail Method
This is the old farmer trick. Hammer a nail into a wall stud.
- Hang it: Put the center hole on the nail.
- Watch the dip: If the right side dips, it is heavy.
- Horizontal: You want it to stay flat. Like a level.
Using a Cone Balancer
These cost five bucks. They are more accurate.
- The cone: It sits on a table. You put the blade on top.
- The bubbles: It shows you exactly where the weight is.
Correcting Imbalance
You have a heavy side. You need to lighten it.
Removing Material
- Don’t grind the edge: You just sharpened it!
- Grind the end: Grind a little off the dull end of the heavy side.
- Check again: It takes time. Grind. Check. Grind. Check.
Reinstalling and Testing
Putting it back together feels good. But torque matters. You don’t want that blade flying off.
Mounting the Blade
Pay attention here. It is easy to get confused.
Orientation Check
I did this wrong once. I mowed a whole strip and nothing happened.
- Grass Side: Usually marked “Bottom” or “Grass Side.”
- Wings up: The fin wings point up to the deck. They create the wind.
- The upside-down mistake: If the flat side hits the grass, it just slaps it.
Washer and Bolt Order
You have a bolt and a washer. Maybe a lock washer too.
- The curve: The washer is usually curved. The cup side faces the blade.
- Hand tight first: Spin the bolt in by hand. Make sure it threads easy.
Torque Specifications
“Gut tight” isn’t enough. You need it tight.
Using a Torque Wrench
If you have one, use it.
- The number: Check your manual. It is usually around 35-50 foot-pounds.
- The block again: Use the wood block to stop the blade from spinning while you tighten.
Maintenance Schedule: How Often to Sharpen?
It depends on your dirt. In sandy soil, I sharpen twice a season. In heavy clay, maybe once.
Usage Factors
Sand is sandpaper. It blasts the edge.
Hours of Mowing
A good rule is every 25 hours.
- The average lawn: That is about once or twice a year for most homes.
- The rock hit: If you hit a rock, check it right away.
Seasonal Routine
I have a routine. It works for me.
- Spring: I sharpen it before the first cut.
- July: I check it when the heat hits. The grass gets tough.
- Fall: I clean it before storage.
Keeping a Spare
This is my best tip. Buy a second blade.
- The swap: When one is dull, swap it. It takes five minutes.
- Sharpen later: Sharpen the dull one on a rainy day. No rush.
Troubleshooting Common Issues
Even pros mess up. I once ground an angle so steep the edge rolled over in five minutes.
Edge Rolling
The metal curls over. It looks like a wire.
The Angle was Too Thin
You wanted a razor blade. That was a mistake.
- Butter knife sharp: You want an edge like a butter knife, not a razor.
- Durability: A thick edge lasts longer against roots and twigs.
Vibration After Sharpening
You start the mower. Your hands go numb from the shaking.
Re-checking Balance
Stop immediately. The balance is off.
- Take it off: Check the balance on the nail again.
- Bent blade: Did you drop it? Check if it is straight.
- Bent shaft: If the blade is fine, you might have bent the engine shaft. That is a pricey fix.
Taking care of your gear feels good. When you push that mower across the yard, and the engine hums smoothly, and the grass looks like a green carpet, you know you did it right. It is a small victory. But on a Saturday morning, it is enough.
FAQs for How to Sharpen Lawnmower Blades
How often should I sharpen my lawn mower blades?
Sharpen your blades after 25 hours of use. If you hit a rock, check the edge fast. A sharp blade cuts clean. This helps your grass stay green and grow thick.
Do I need to remove the blade to sharpen it?
It is best to take the blade off. This lets you check the balance. You can leave it on, but it is hard to file. Removing it is safer and gives a better cut.
What is the best tool to sharpen lawnmower blades?
Knowing how to sharpen lawnmower blades starts with the tool. A hand file is safe and cheap. A bench grinder is fast. Both put a sharp edge on your mower.
Which way do I turn the bolt to loosen the blade?
Most bolts turn left to loosen. This is the normal way. Check your manual to be sure. Some mowers use reverse threads that turn right to loosen the bolt.
How sharp should my lawn mower blade be?
Aim for a butter knife edge, not a razor. A razor edge breaks on roots. A thick edge lasts longer. It cuts the grass clean and stays sharp for weeks.
Final Thoughts on a Sharp Cut
If you like saving cash and using your hands, learning how to sharpen lawnmower blades is perfect for you. However, if you have no tools or time, you might want to visit a shop. From what I know, doing it yourself feels great and saves money.
I remember seeing my lawn turn brown one summer. It looked sad. Then I fixed the edge. The next week, the grass was green and soft. It is a small job, but it brings big pride. Just take your time and stay safe. Your lawn will thank you for the care.
Read More: Are Lawnmower Blades Reverse Threaded or Not? Fix a Stuck Blade Bolt